
OldForge Campfire / Tea Dust Tenmoku Glaze
I recently took a glaze recipe and adjusted it to suit me, and I thought it might be an interesting case study for what changes I made and why I made them.

The starting point was this Tenmoku Gold recipe

I never actually tried this version of the recipe as I don’t have any Cornwall Stone. So the immediate change I made was to swap in Nepheline Syenite in place of the Cornwall Stone (both are the main source of Alkaline Metal flux in the recipe) and Talc in place of the Dolomite (Talc provides Magnesium whereas Dolomite provides Magnesium and Calcium). Both those changes should make it easier to adjust the chemistry later as they both provide a greater density of the elements I want.

I want to say at this point that I won’t be going all the way back to basic concepts with this post, it’s too big a topic. I learnt about the underlying chemistry from a Ceramic Materials Workshop class and if you’re interested in the topic but this post doesn’t make total sense to you then I’d highly recommend doing the same. I would suggest either the full Understanding Glazes course with Labs and Hangouts, or the shorter and cheaper Middle Glazes class on which you can use the offer code oldforgecmw for 25% off. Either course will give you a great grounding in the chemistry behind the ingredients and will help you understand how and why when adjusting glaze recipes.
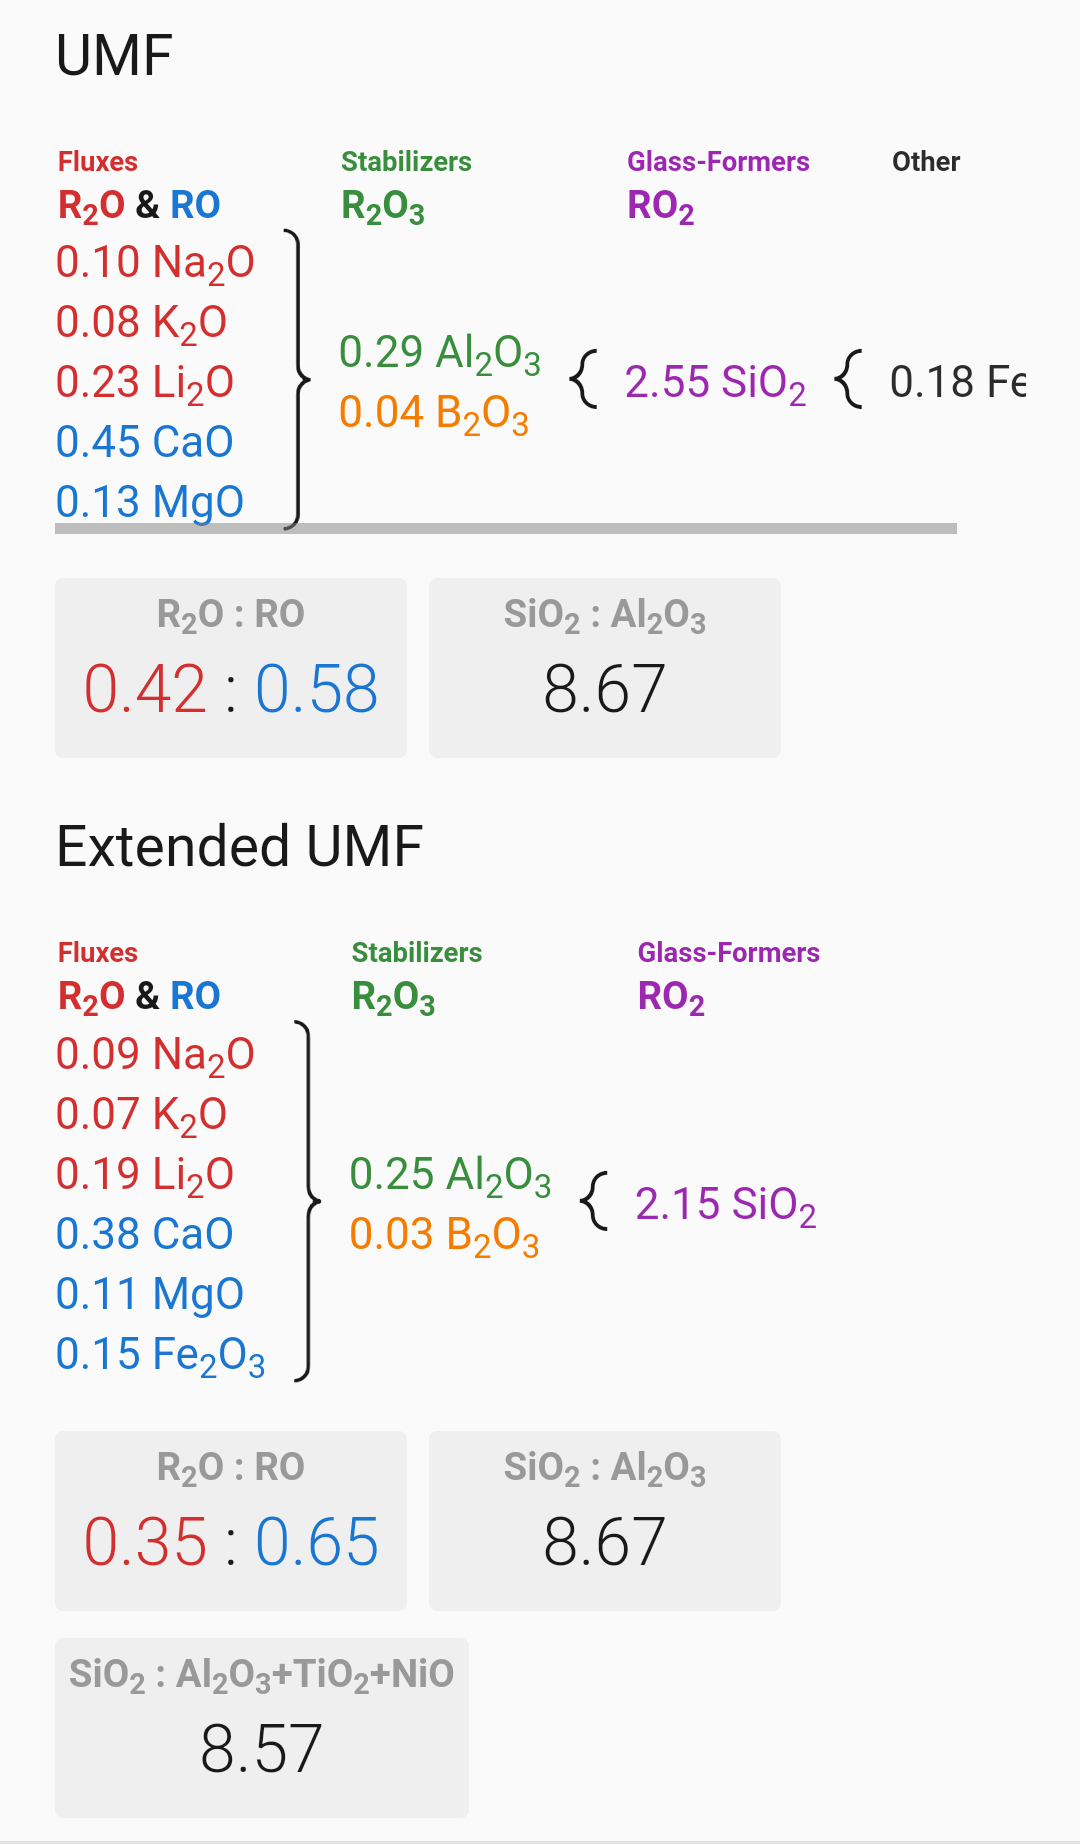
I liked that first version, but there are a couple of things I didn’t think ideal about the recipe. Firstly, it uses Lithium Carbonate. This is very expensive. There can be good reasons to use Lithium Carb, but the chemistry in this glaze doesn’t seem to need it. One thing it is doing is altering the flux ratio. There are two categories of flux used in glazes, expressed as R2O & RO, and the ratio of these categories is responsible for a few characteristics of the glaze. In general, stable glazes are found around the 0.2:0.8 - 0.3:0.7 area. The original recipe had a ratio of 0.35:0.65 (on the extended UMF) which isn’t awful, but given that it’s the Lithium that’s pushing the R2O up we might be able to solve both of these issues at once.
Next recipe, this time without the Lithium Carb and with Frit 3134 in place of Gerstley Borate. This change was made to bring the ingredients more in line with my FirstFive series of glazes, this way anyone who bought the ingredients for that can easily try this glaze.

It worked well, but wasn’t quite the same as the original, mostly due to a greater density of crystals. The formation of crystals in a microcrystalline glaze is a delicate balance of a few factors. Firstly there’s the glaze melt - the more melted a glaze is, the fewer crystals will form.
There are usually 3 ways the glaze melt is controlled in a cone 6 microcrystalline glaze. There’s the levels of glass formers (silica/alumina), the amount of boron, and the eutectic between the different fluxes. Balancing these can be a bit fiddly, and is why a glaze that works for one person might not work exactly the same elsewhere (with a different kiln, regional ingredients, etc). This is another reason that understanding the chemistry is so useful.
The other way that microcrystalline glazes can be controlled is the ratio of the Alkaline Earth fluxes. Different fluxes will crystallise differently, and generally it will be the Zinc or Magnesium that is responsible for crystal growth (in this glaze it’s magnesium). This is an easier variable to control.
The sensible thing to do here would be to do one or two adjusted versions and do a line blend between them to find the exact point you like the most. I didn’t do that. I didn’t have many test tiles left and I wanted the recipe to round to the nearest 2.5% because I hate measuring out awkward percentages.
So I just moved a couple of variables in small increments to see what would happen:
Version 2 - This had a few changes. Lower Silica/Alumina, higher Boron, Calcium:Magnesium ratio more towards Calcium, and more Iron. Each change was 2.5% but the cumulative effect was too much and there were now fewer crystals than I wanted.

Version 3 - This one was closer to version 1. The only change was that 2.5 Talc was swapped for 2.5% 3134. This lowered the Magnesium and raised the Boron slightly. It was still a little too much, and there weren’t enough crystals. I also did a version of this with much higher Magnesium which overcrystallised, but gives me a fun direction to experiement with selectively layering to force increased crystallisation.
Version 4. It’s essentially the same change as Version 3, but with the whiting swapped for 3134. This raises the boron but keeps the magnesium level the same, so the difference between V1 and V4 is just a slightly increased melt leading to a slightly decreased number of crystals in the glaze.

Version 4 on a test tile
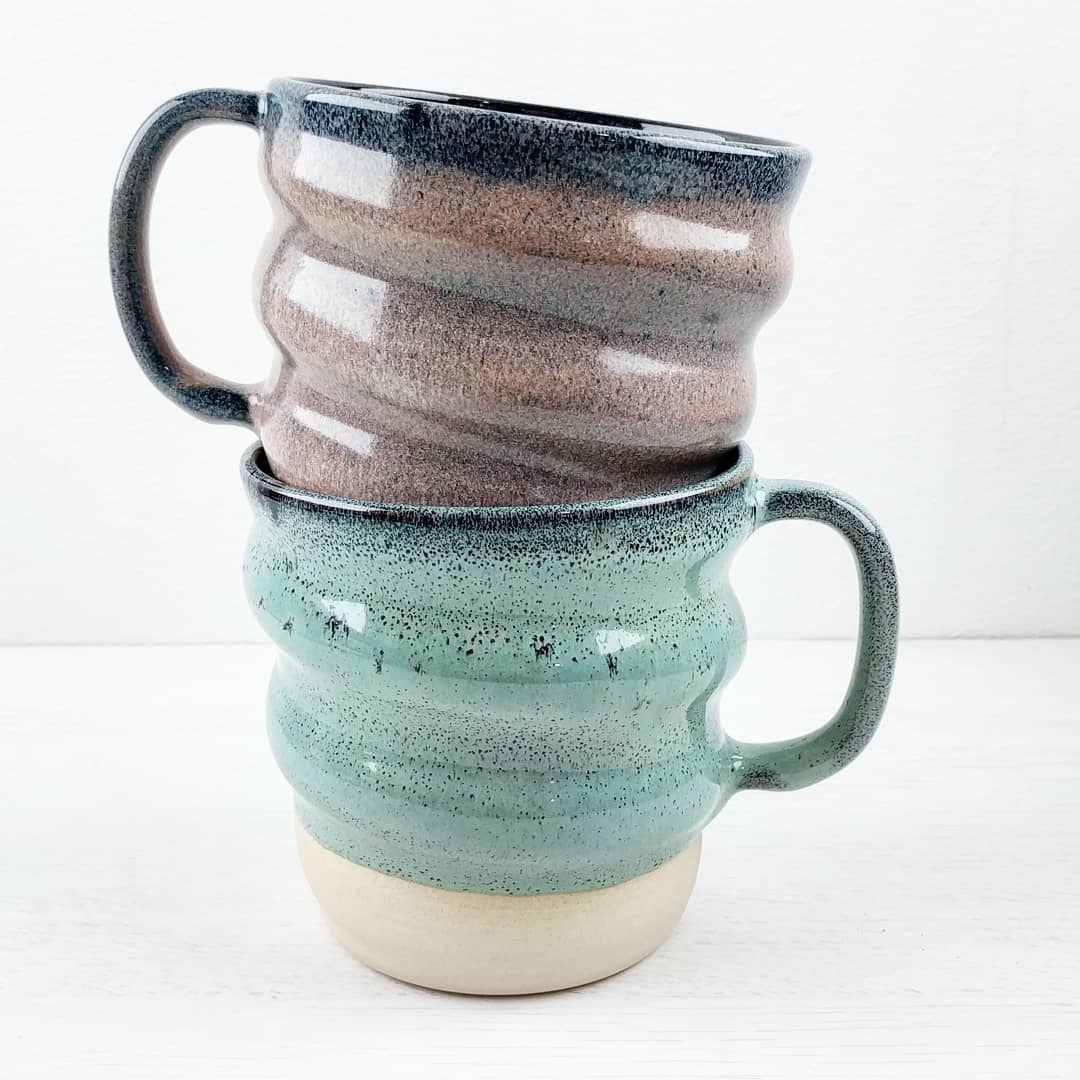
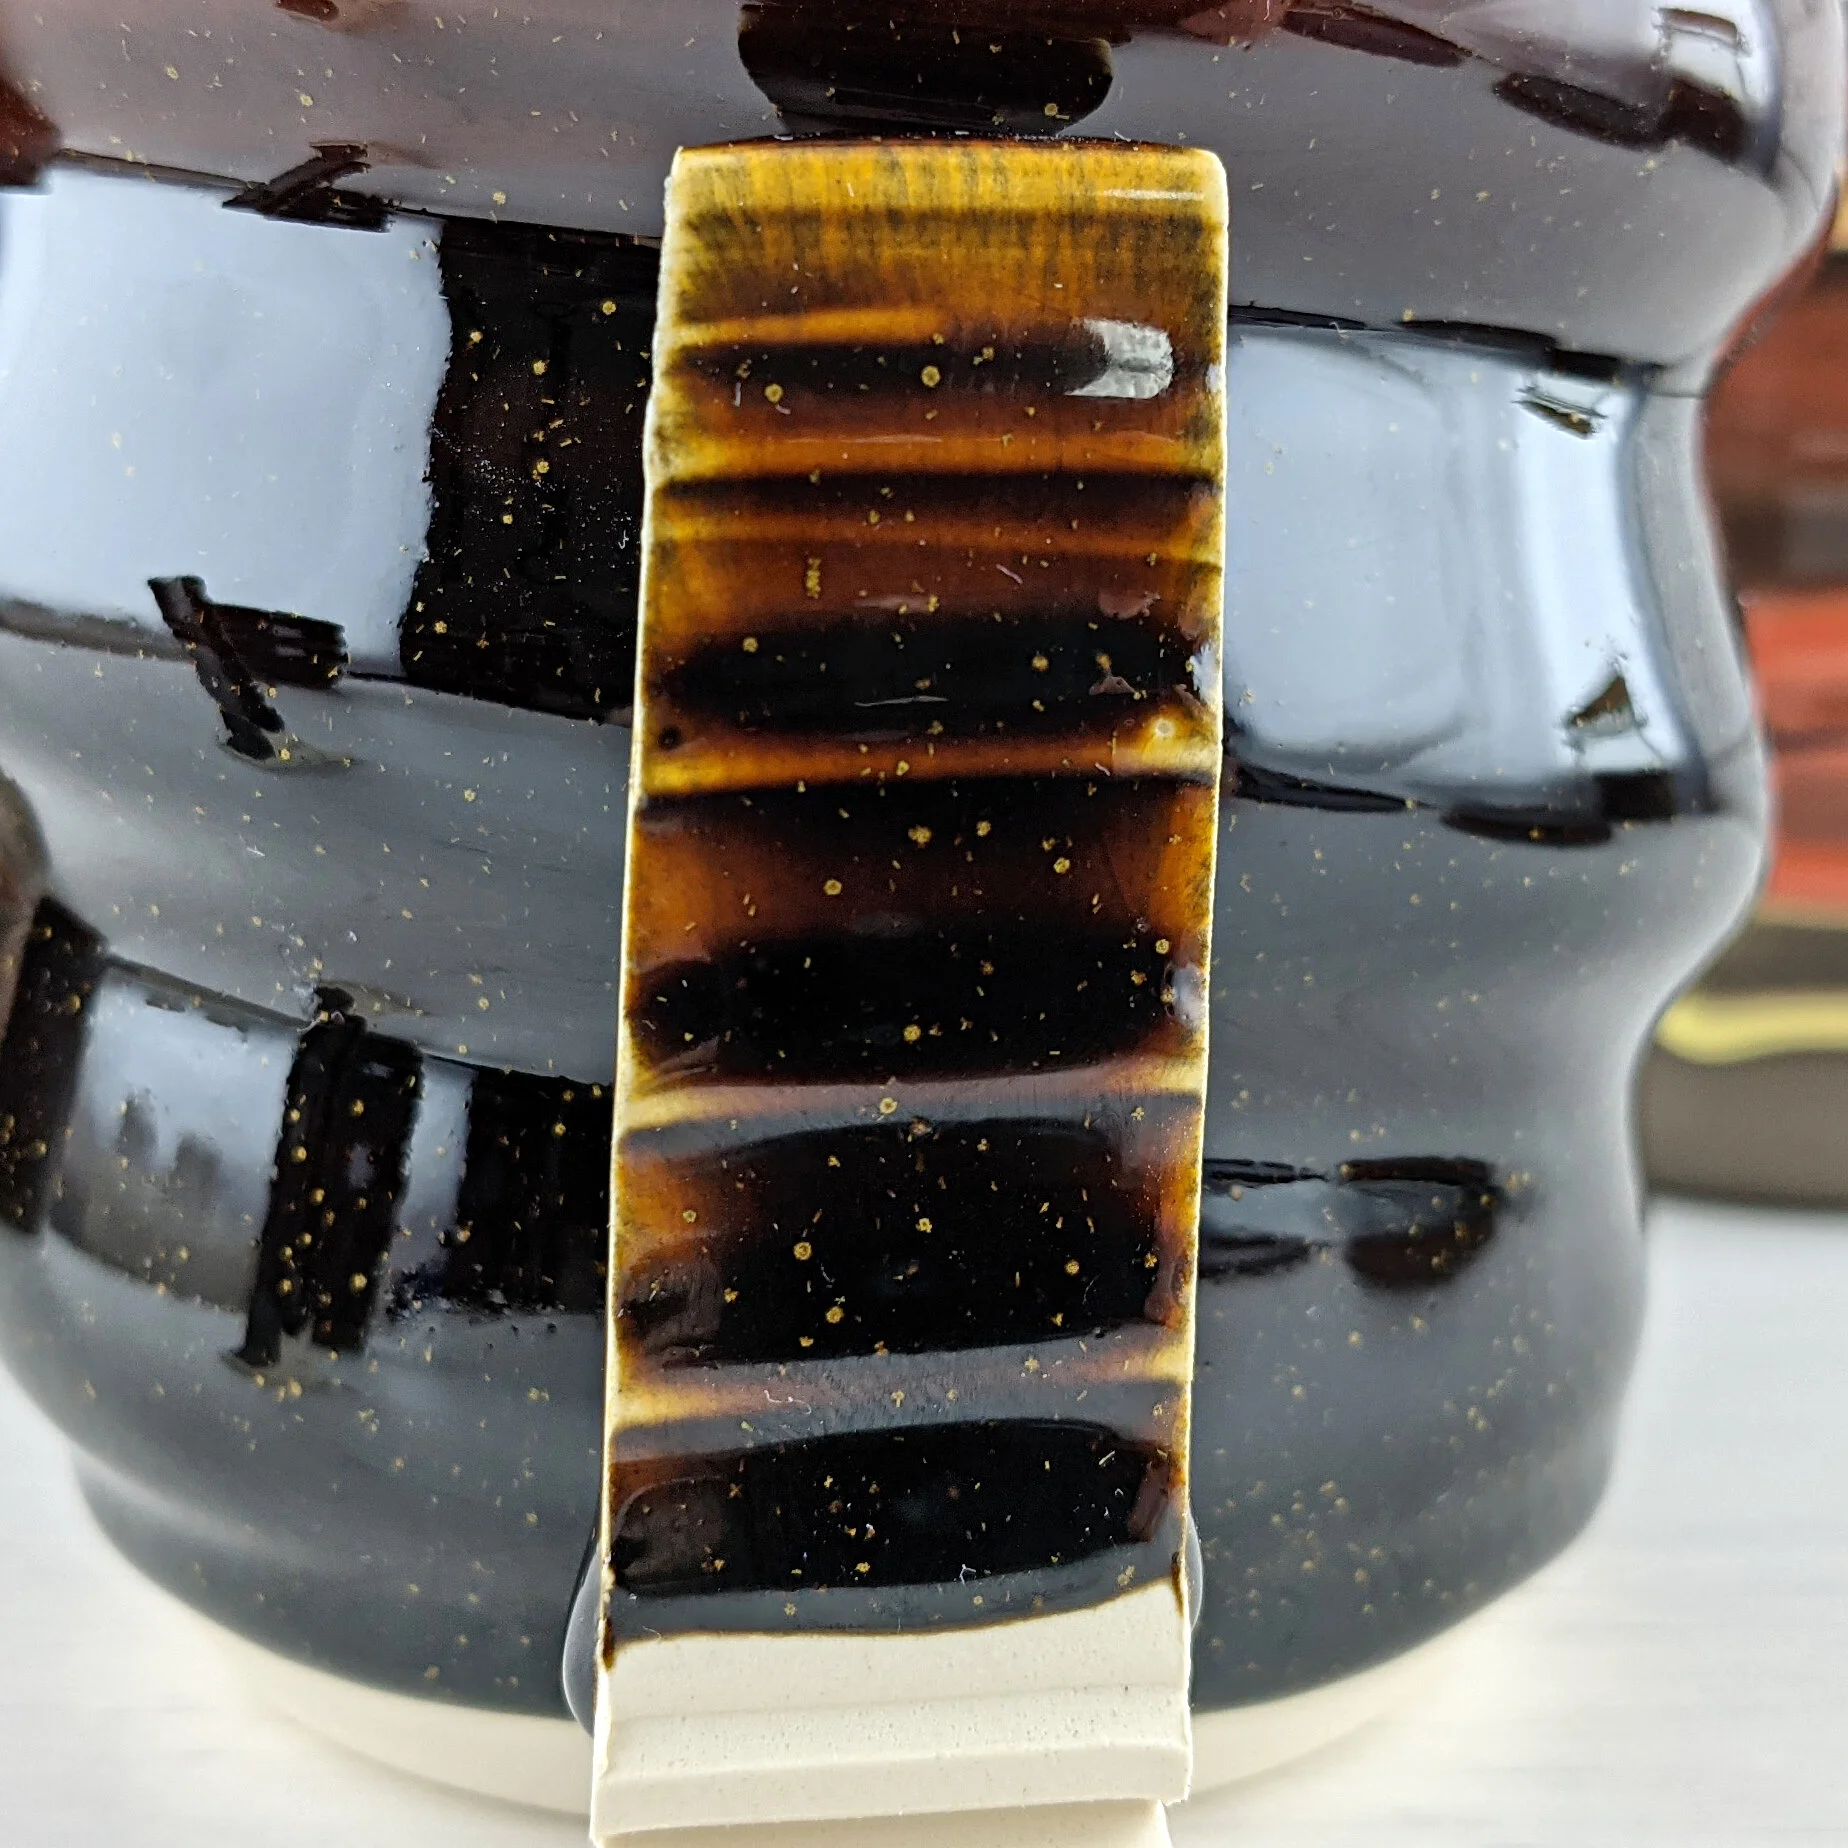
This worked really well on test tiles, and the gradient with more crystals at the base and fewer drifting off into the top reminded me of moving a log in a campfire and having glowing embers floating off into the air.
When applied to larger pieces it worked quite well one one shelf of the kiln but the slightly cooler shelves were excessively crystallised. Going from test tiles to full sized pieces often means revising the recipe slightly, and in this case I can just jump back to Version 3 and see how that works on larger pieces.

I fired a few full sized pieces with just Version 3 on them and found that the crystal growth was still slightly below what I wanted

Which means I’m actually in a really good position to get the effect I want. I have two glazes, one with fewer crystals than I want and one with an excessive amount. By controlling the application of both I should be able to get a gradient.
My approach is to dip the top three quarters in the lower crystal recipe (Version 3) then immediately dip the whole piece in the higher crystal recipe (version 4). This means the bottom quarter of the glaze will be the high crystal version for the campfire part, and the overlap will mean the movement of the glaze in the firing naturally produces a gradient between the two.
My firing schedule can be found here. The firing is a vital part of the process for the number and size of the crystals and you might need to adjust the recipes to suit your firing (or firing to suit the recipes, but it’s better to get all your glazes working in the same schedule where possible).
I would recommend mixing up a test of both of the Campfire recipes and applying them to multiple test tiles placed on different shelves in your kiln. You should then know what sort of crystallisation you’re getting and what the variation throughout the kiln would be. If you need more crystallisation, you can remove whiting and replace it with talc, and if you need less you can do the reverse. It’s not a chemically perfect swap, but won’t drastically change the rest of the chemistry either.
Here are all the recipes and UMFs side by side


If you like this sort of content and want to support the creation of more, I now have a Patreon specifically for it or a page on my website if you just want to make a single donation.


