
Skutt Type S Thermocouple Upgrade - KMT 818
I recently upgraded the default K type thermocouple in my Skutt KMT 818 to a S type thermocouple bought from Cromartie. It was a straightforward process, but I couldn’t find high quality images online before I started and thought it would be worth sharing the images I took as I did it.
Type S Thermocouple
There are a variety of thermocouple types, they use different materials to measure the temperature and this gives different characteristics (like accuracy, durability, and price). This post from CMW gives a good summary of the differences between K and S type.
I want to replace mine with the S type because I can’t place anything underneath the K type due to the spitting. I get one fewer piece in every glaze firing as a result
The Process
There are 4 things to change. You have to replace the thermocouple (obviously), but you also have to change the wire connecting it to the controller, you have to insert a jumper over a pair of pins on the circuit board, and you have to tell the kiln controller that you’ve changed the thermocouple.

Type S Thermocouple and Orange Lead (UK version)

Heat Shield and Connectors
https://skutt.com/skutt-resources/repairs/type-s-thermocouple-upgrade/
The first thing to do is make sure there is no power getting to the kiln, then open it up by removing the screw on one side of the control box. If you were just replacing the thermocouple, you’d remove the yellow lead from the spade connectors shown above and unscrew the old thermocouple. As I’m upgrading it, I need to remove the heat shield that the connectors attach to. This is done by removing the screws on the outside of the control box (you can see one at the bottom of the image above)
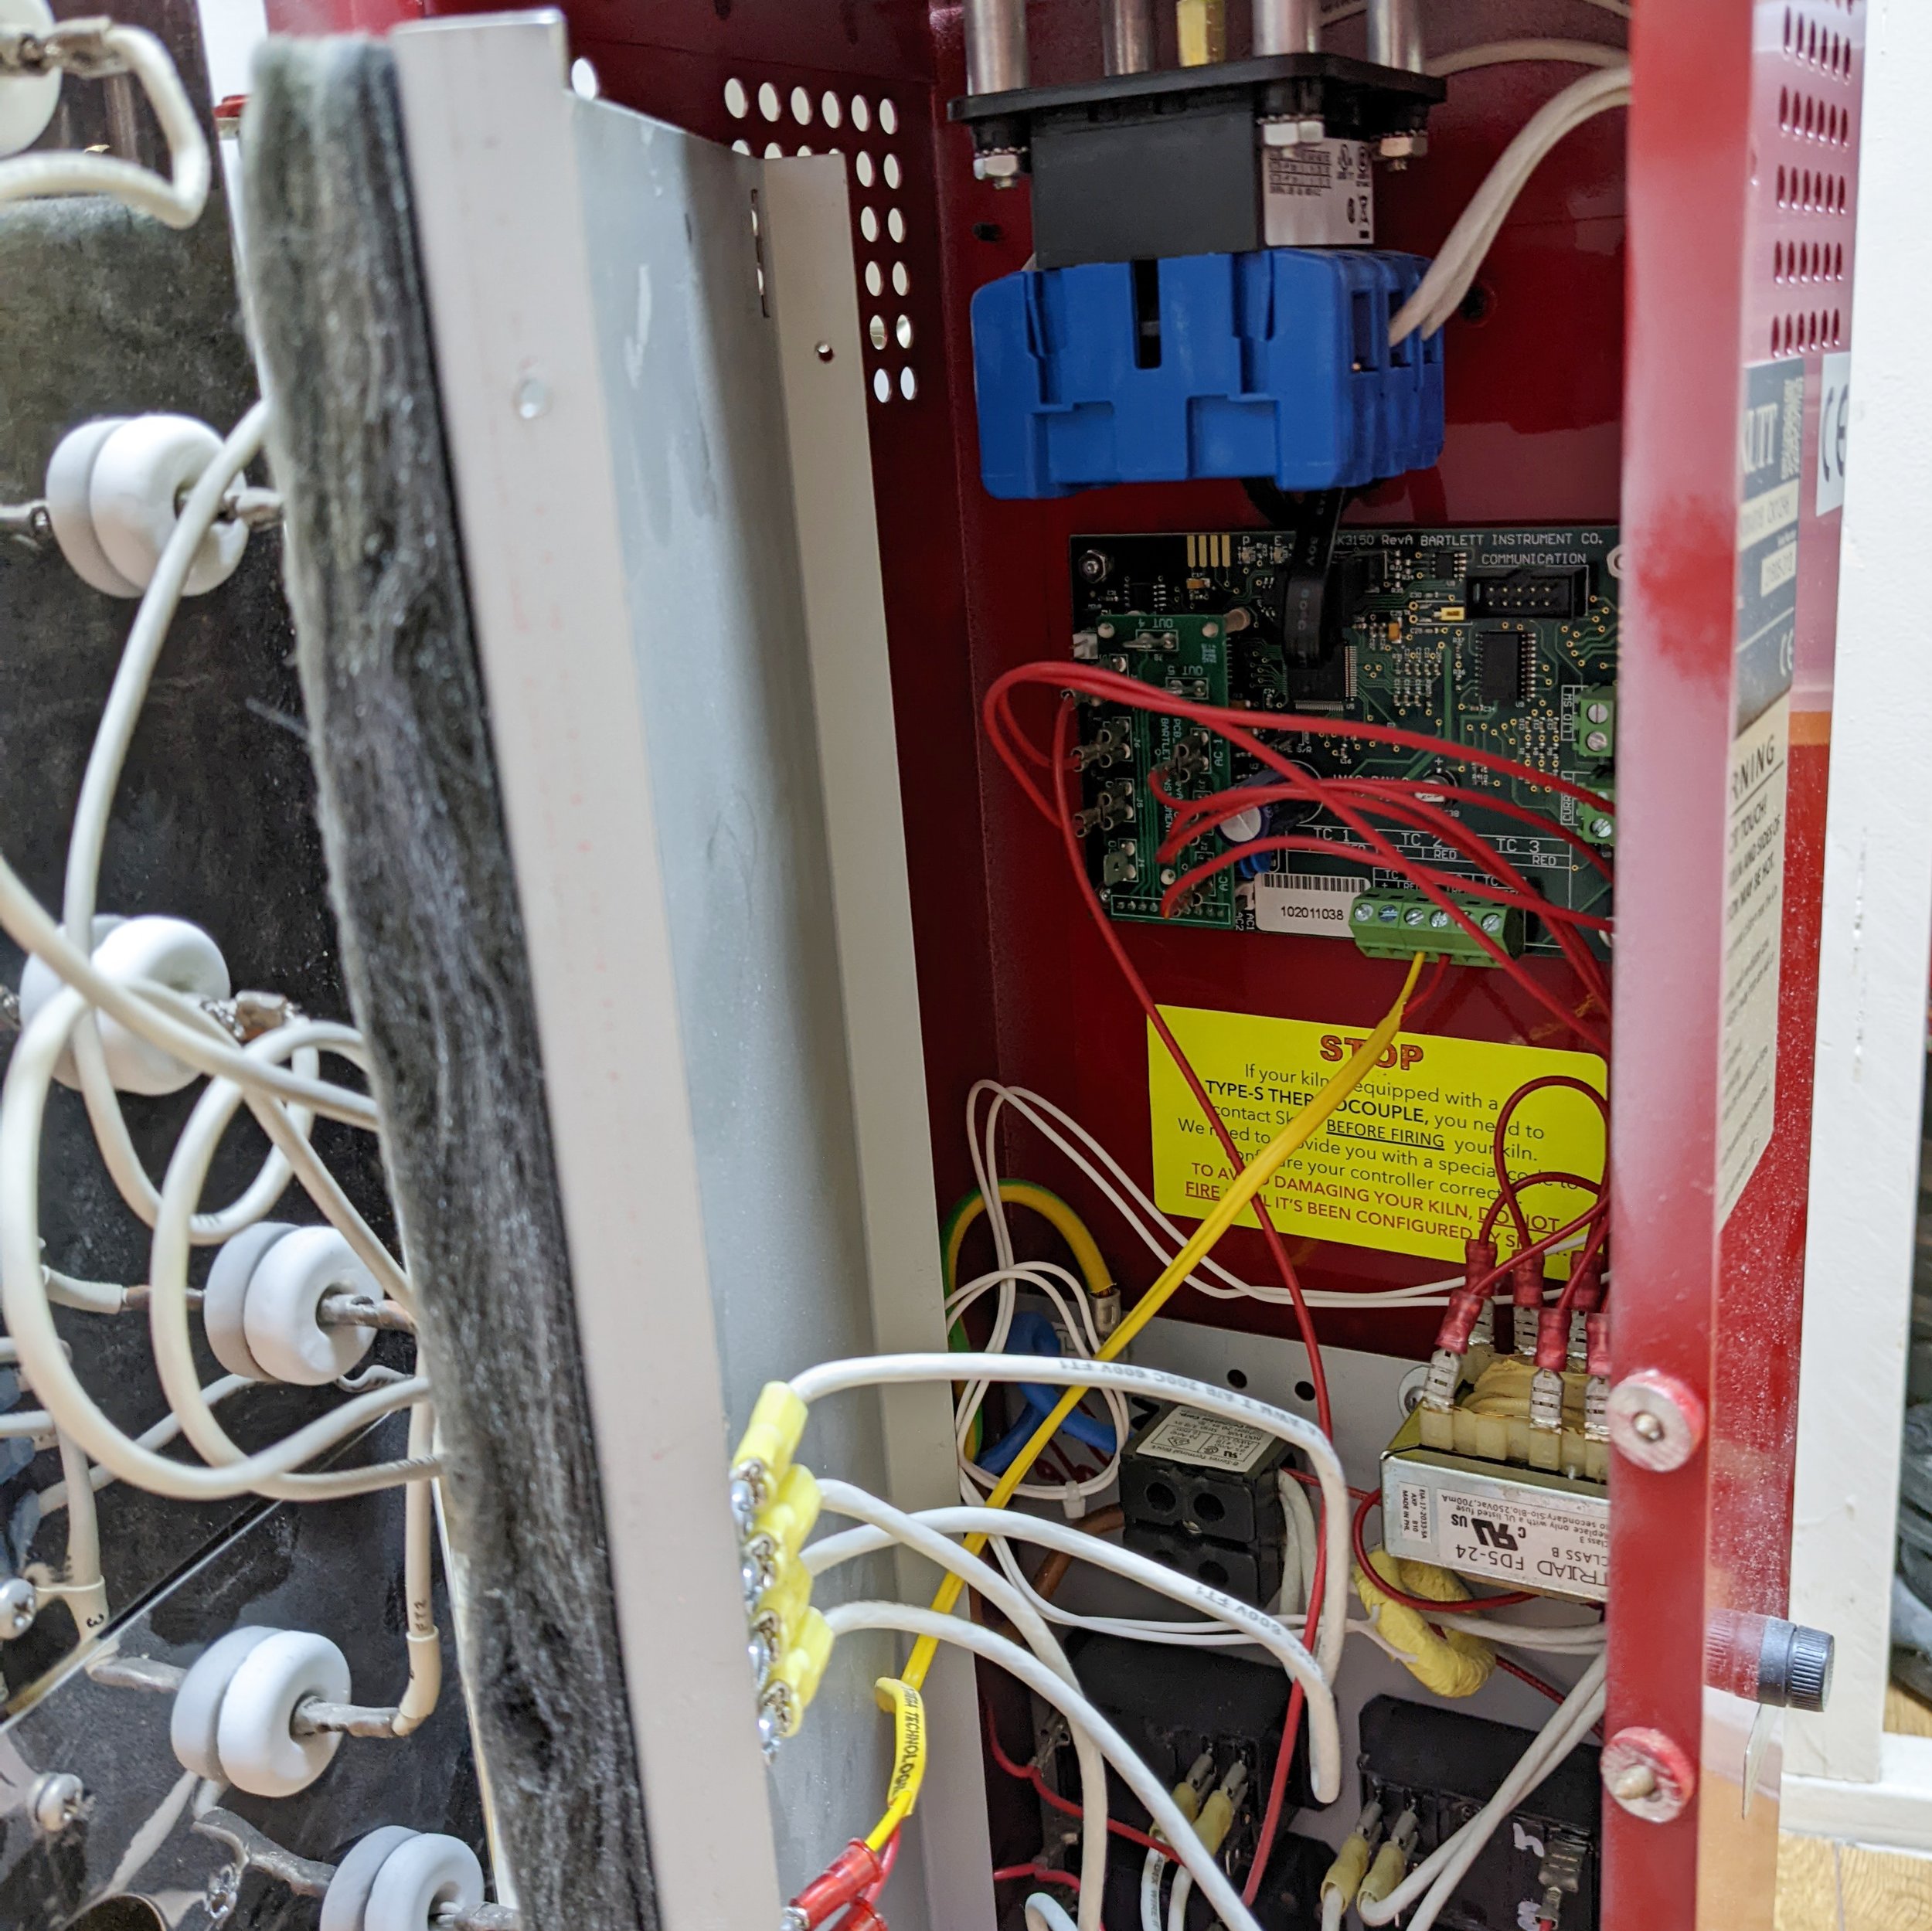
Behind the heat shield

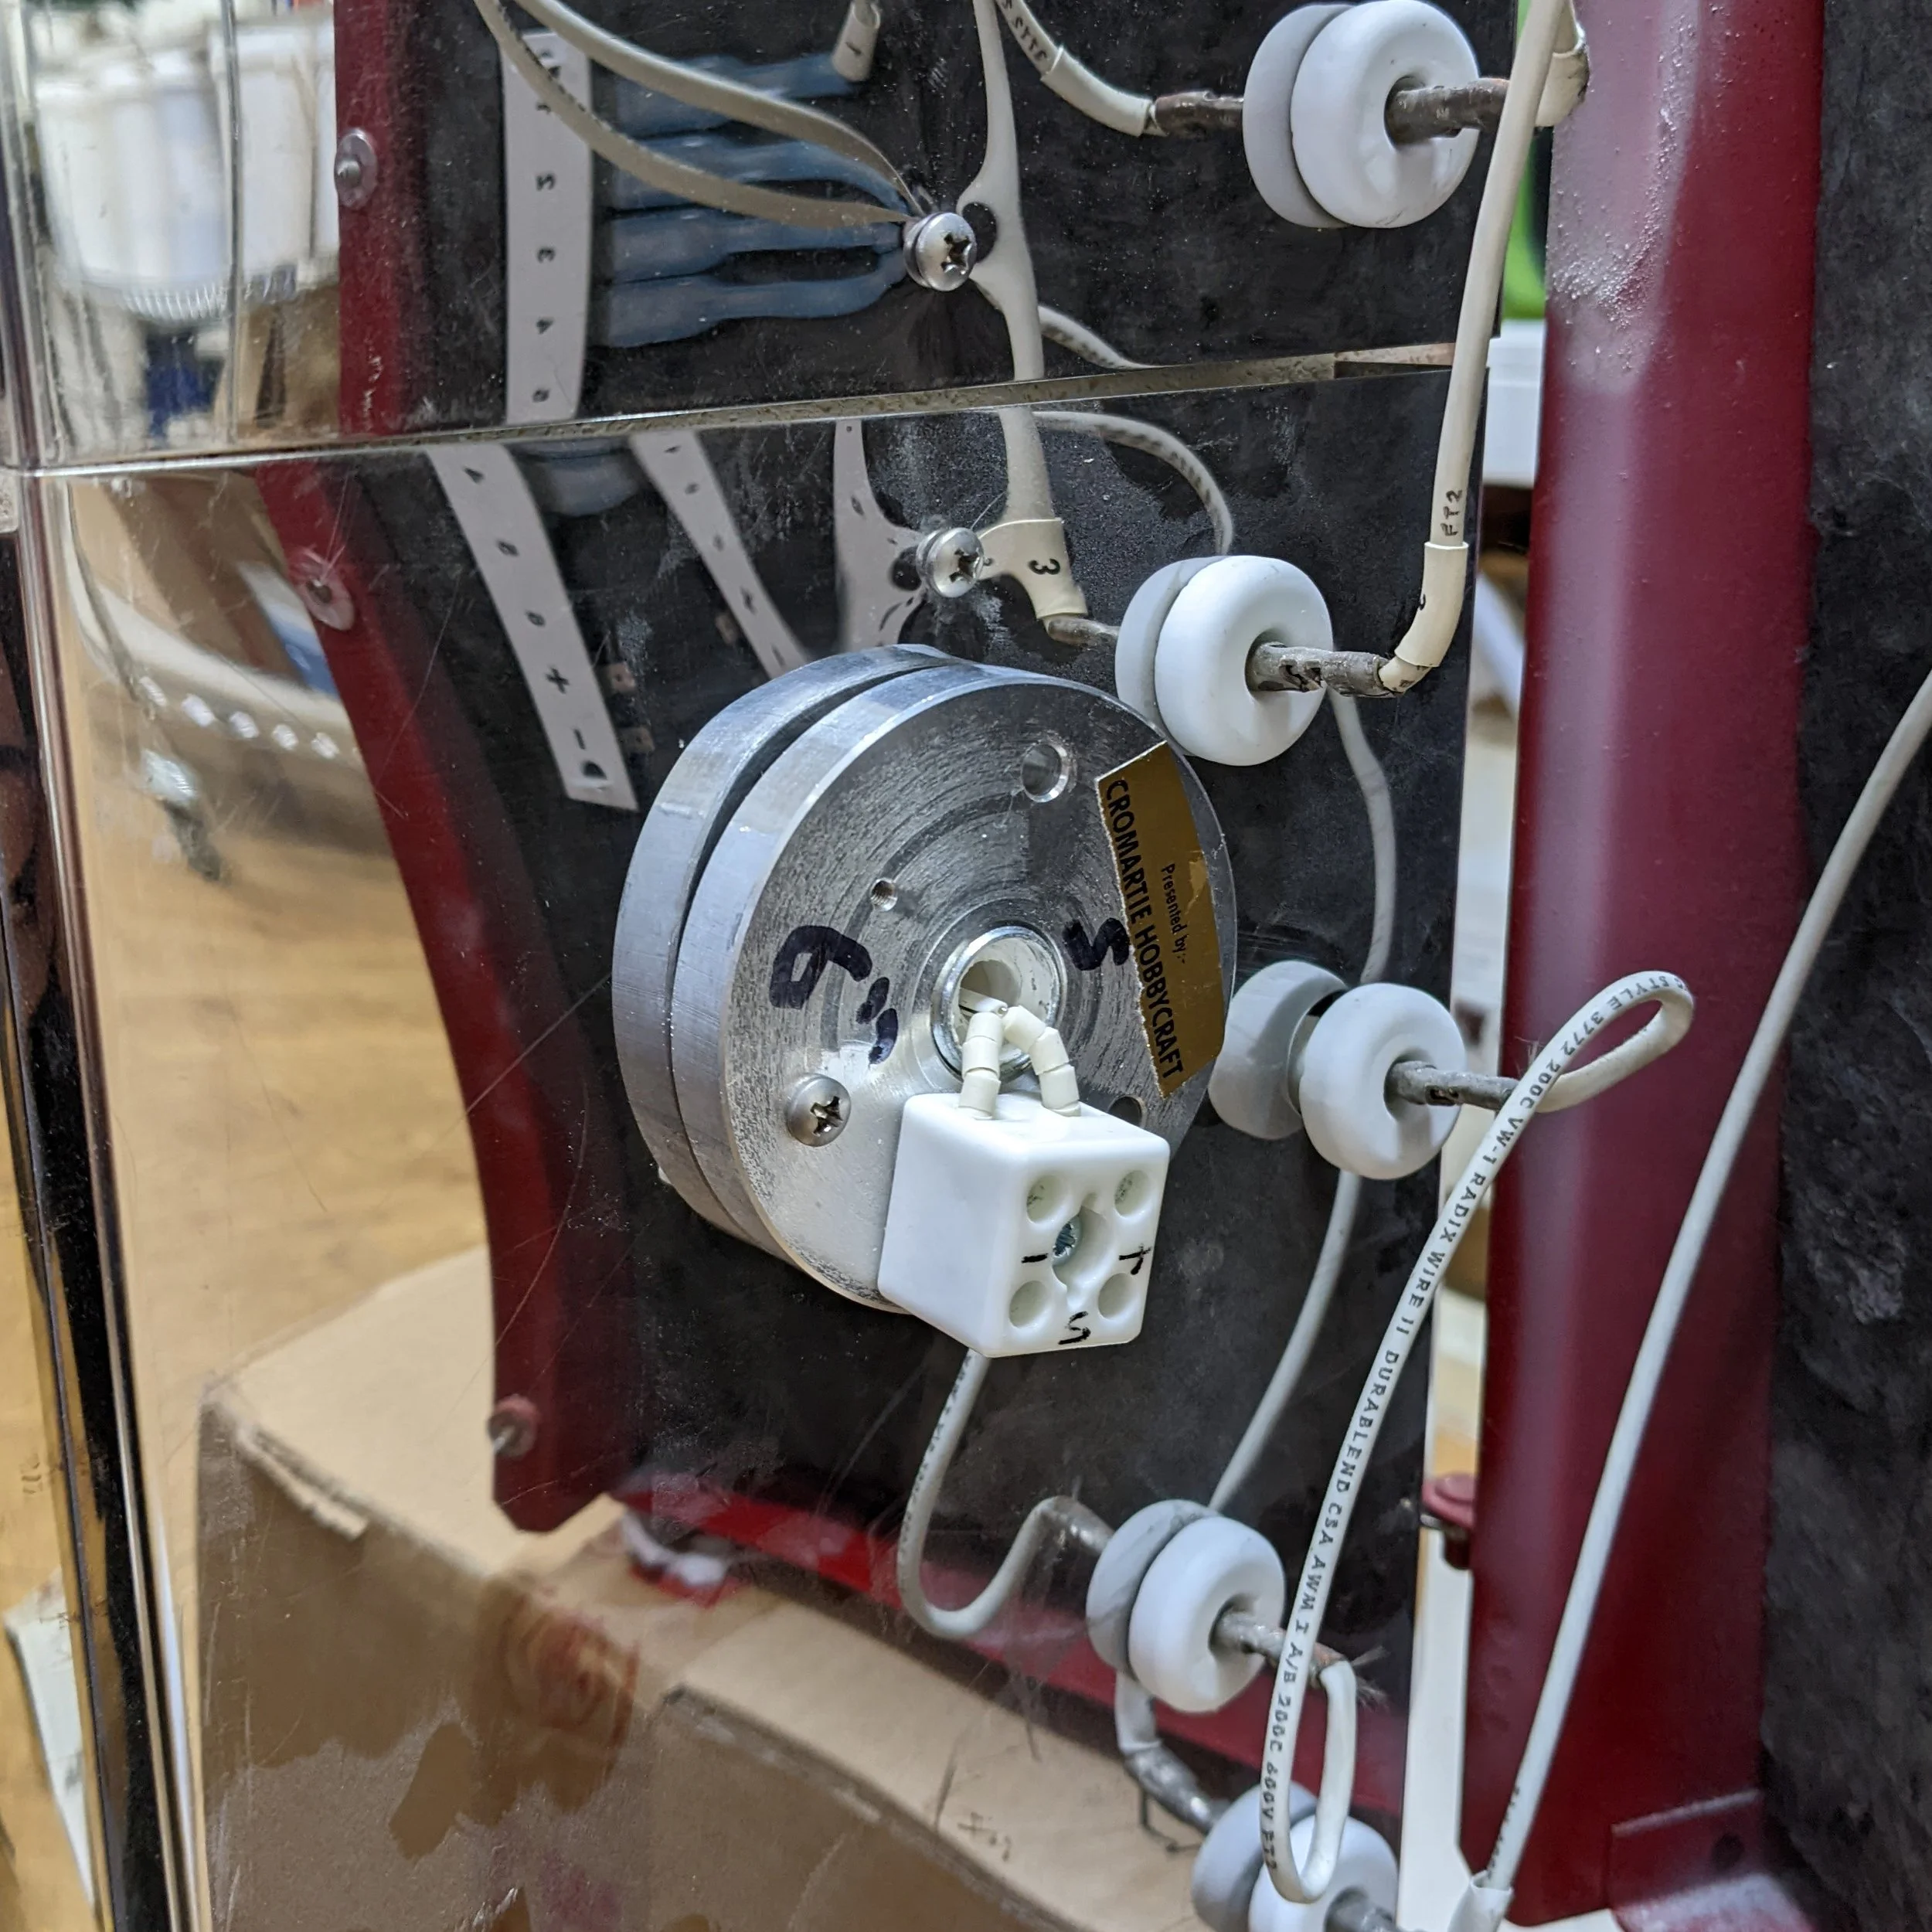
Jumper

Location of the Jumper pins

With Jumper in place
The Jumper has to be installed over the two pins. On newer kilns like mine, they are clearly labelled on the board itself. On older kilns they might be slightly harder to locate.
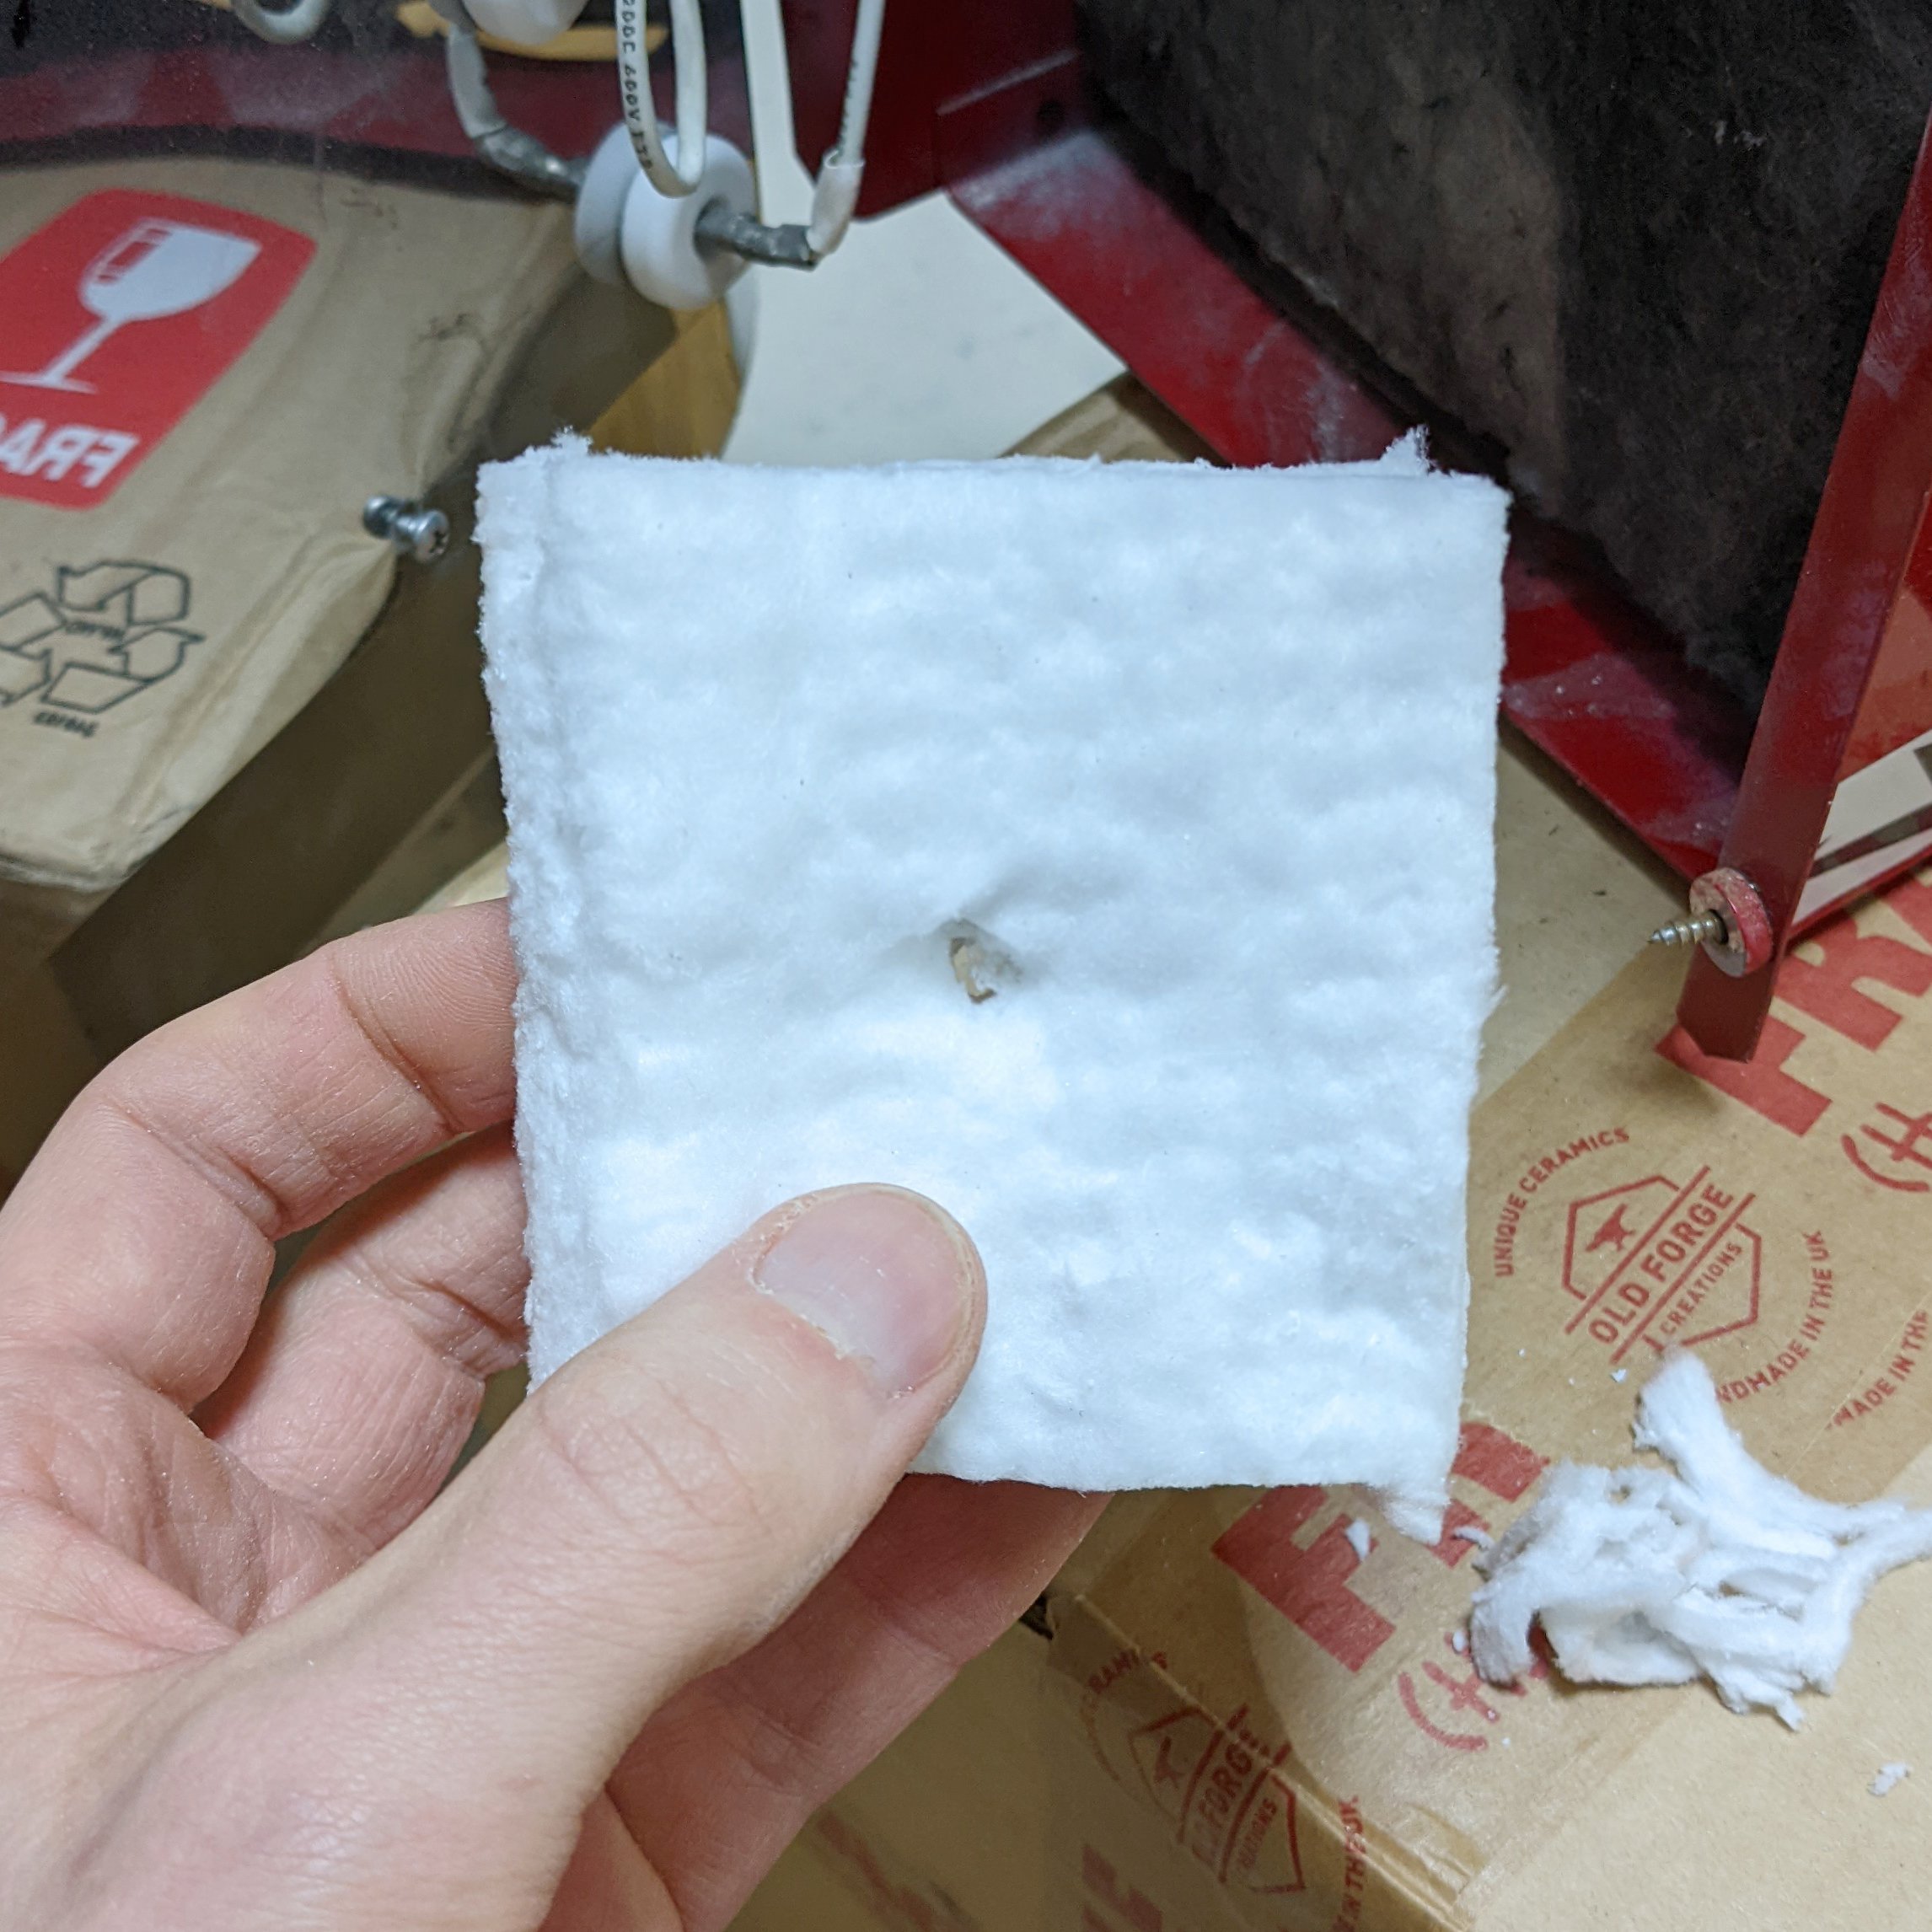
A square of Superwool I used as extra insulation

With the Superwool in place
And with the thermocouple in place
One minor issue is that the diameter of the S type thermocouples that Skutt use is a little smaller than the K type, so there will be a gap around it. I had some 1260c rated Superwool, so I made a shield that could sit between the kiln wall and the attachment plate to prevent excess heat getting into the control box. I later found out that Cromartie source their own thermocouples here in the UK and I think they’re a larger diameter than the standard Skutt thermocouples, so this might not have been as necessary as it would be usually.

The S type wire from Cromartie
Cromartie also source their own wire, so this stage will not follow the standard Skutt instructions. The wire from Cromartie is orange and comes in a single length, whereas the standard would be a pair of green wires. Typically you’d run one wire from each side of the insulating shield panel, and one of the wires would be insulated for use on the hot side. I’ve checked with Cromartie and this whole wire is heat rated. It’s long enough to be run in a single length by going underneath the heat shield, so that’s what I did.

Orange = Positive, White = Negative
Once that’s connected at both ends (making sure you have the wires the right way round!), you can put the heat shield back in place and close the control box.

The last thing to do is tell the controller that you have changed the thermocouple. The instructions to do this for the old controllers can be found on the Skutt instructions. The Touchscreen controllers have to be set by going to Advanced Settings > Factory Protected. Use the code 443 then press Save. Choose Thermocouple Type from the Factory Settings menu and change it from Type K to Type S.
I’d like to emphasise again that this is just a description of what I did. If you want to do this yourself and have any questions, don’t take these as a complete guide. Both Skutt and Cromartie give great support and have been invaluable in clarifying the questions I had, so please contact them (or whoever you bought it from if you’re not in the UK) before making any of these changes.
Finally, check the kiln. I did an initial test to 100c


Pretty good!
Then I loaded the kiln with the furniture, cones on every shelf, and a few test tiles of my glazes that are more sensitive to firing schedule, and fired a full glaze firing while I was around to watch it (just in case). From what I understand though, if you’ve done any of this wrong it will become fairly immediately apparent as the kiln will be dramatically misreading the temperature.