
Silicone Baking Moulds for Plaster Casting
Slipcasting is a fantastic process. It can be a convenient way to produce complex pieces faster and more consistently than would be possible with any other making process. However, the amount of effort and knowledge needed to get to the point where it’s quick and convenient is huge. It’s simultaneously one of the most and least beginner friendly making process, depending on how many stages you attempt to do yourself.

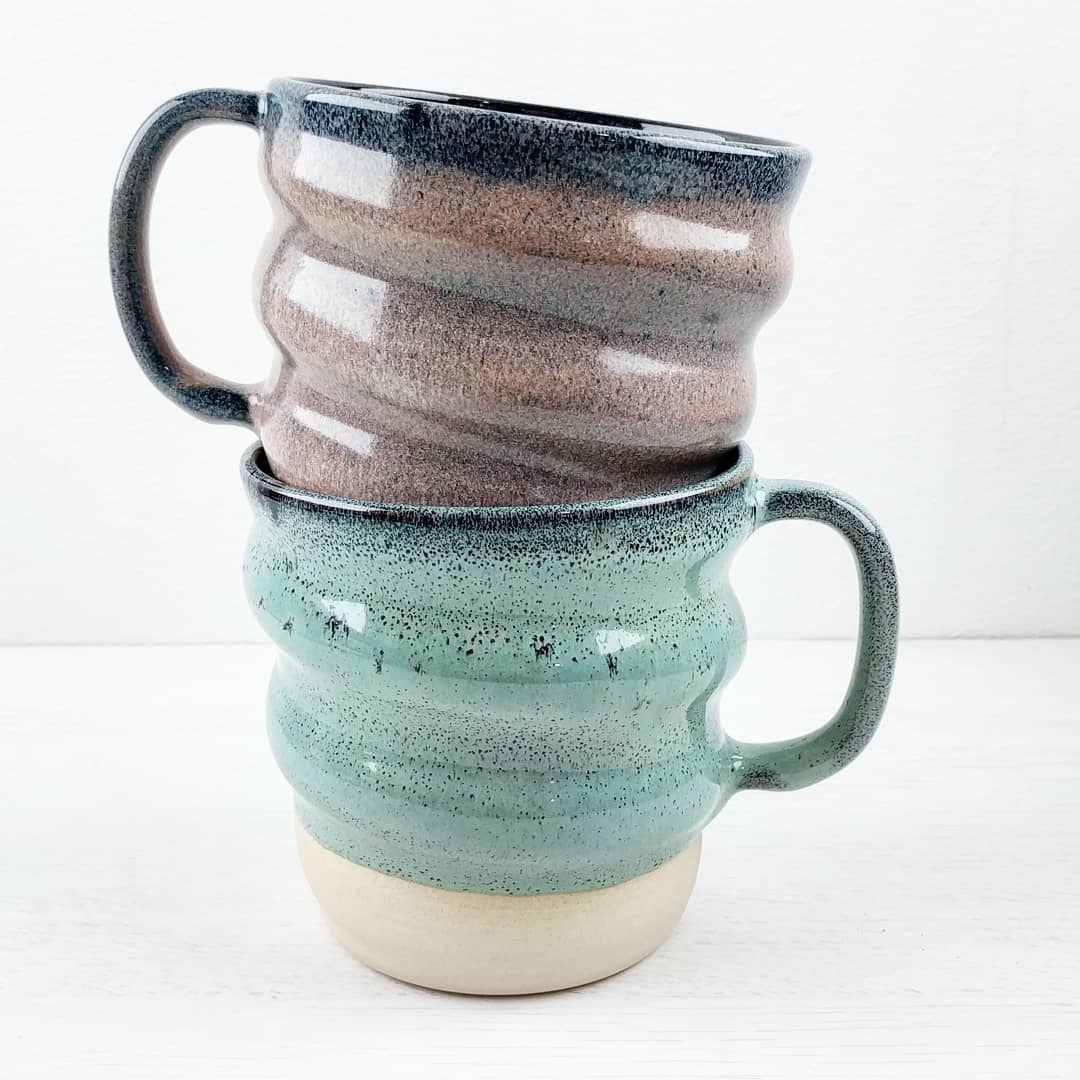
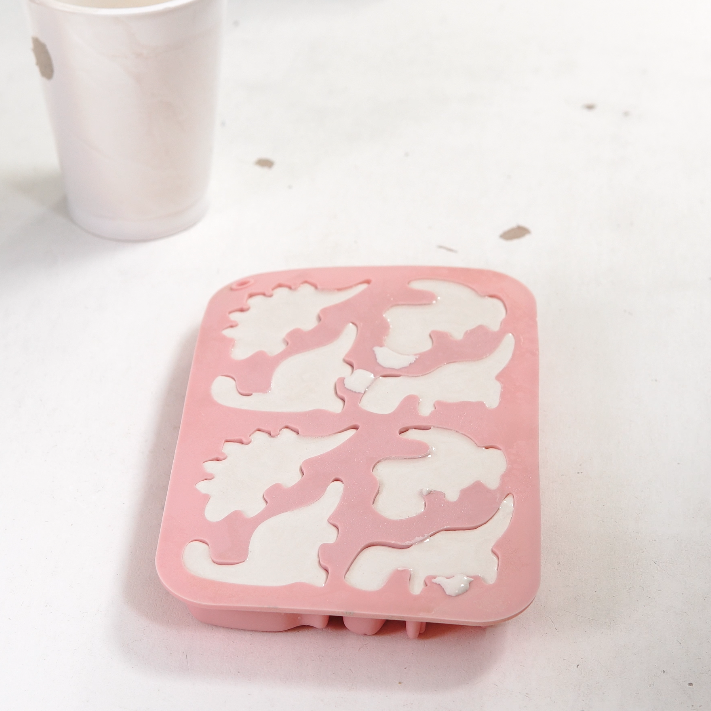
Little slipcast test tiles from a baking mould
Slipcasting Basics
Slipcasting is the process of pouring liquid clay (slip) into plaster moulds to form a solid clay object in the shape of the mould (casting). It works because the plaster is absorbent and pulls the extra water out of the slip. Slip is poured into the mould and starts to solidify against the plaster walls. Once the solid clay formation is sufficiently thick, the excess slip is poured out. This leaves a hollow clay shape with the external design matching that of the mould.


Beginner Friendly?
The process of casting with slip has many complicated stages, but the barriers are lowered to the point that a total beginner could cast functional pieces very quickly if the plaster and slip are premade. This makes it very useful in commercial settings, where a few skilled mouldmakers and technicians can provide the tools for much larger productions with a less skilled workforce.
But what about studio potters looking to give slipcasting a go?
Slipcasting looks straightforward but the reality is that every single process is difficult and can present a barrier to ending with anything usable. You can skip straight past certain sections, either by learning a different skill (like 3D modelling and printing) or by purchasing premade (moulds and/or slip).
There are upsides and downsides to purchasing premade moulds. The upside is that it avoids the entire mouldmaking and liquid plaster aspects of the process. The downside is that it greatly limits the designs available to you, and costs a lot in shipping. Plaster moulds are relatively big, heavy, fragile, and need to be replaced as they wear out. It’s far more practical in the long run to be able to make your own plaster, and more satisfying to get a design that’s more uncommon.
The process I’m outlining in this blog post is my attempt at finding a convenient halfway point. Mouldmaking, but with some of the difficulty removed.
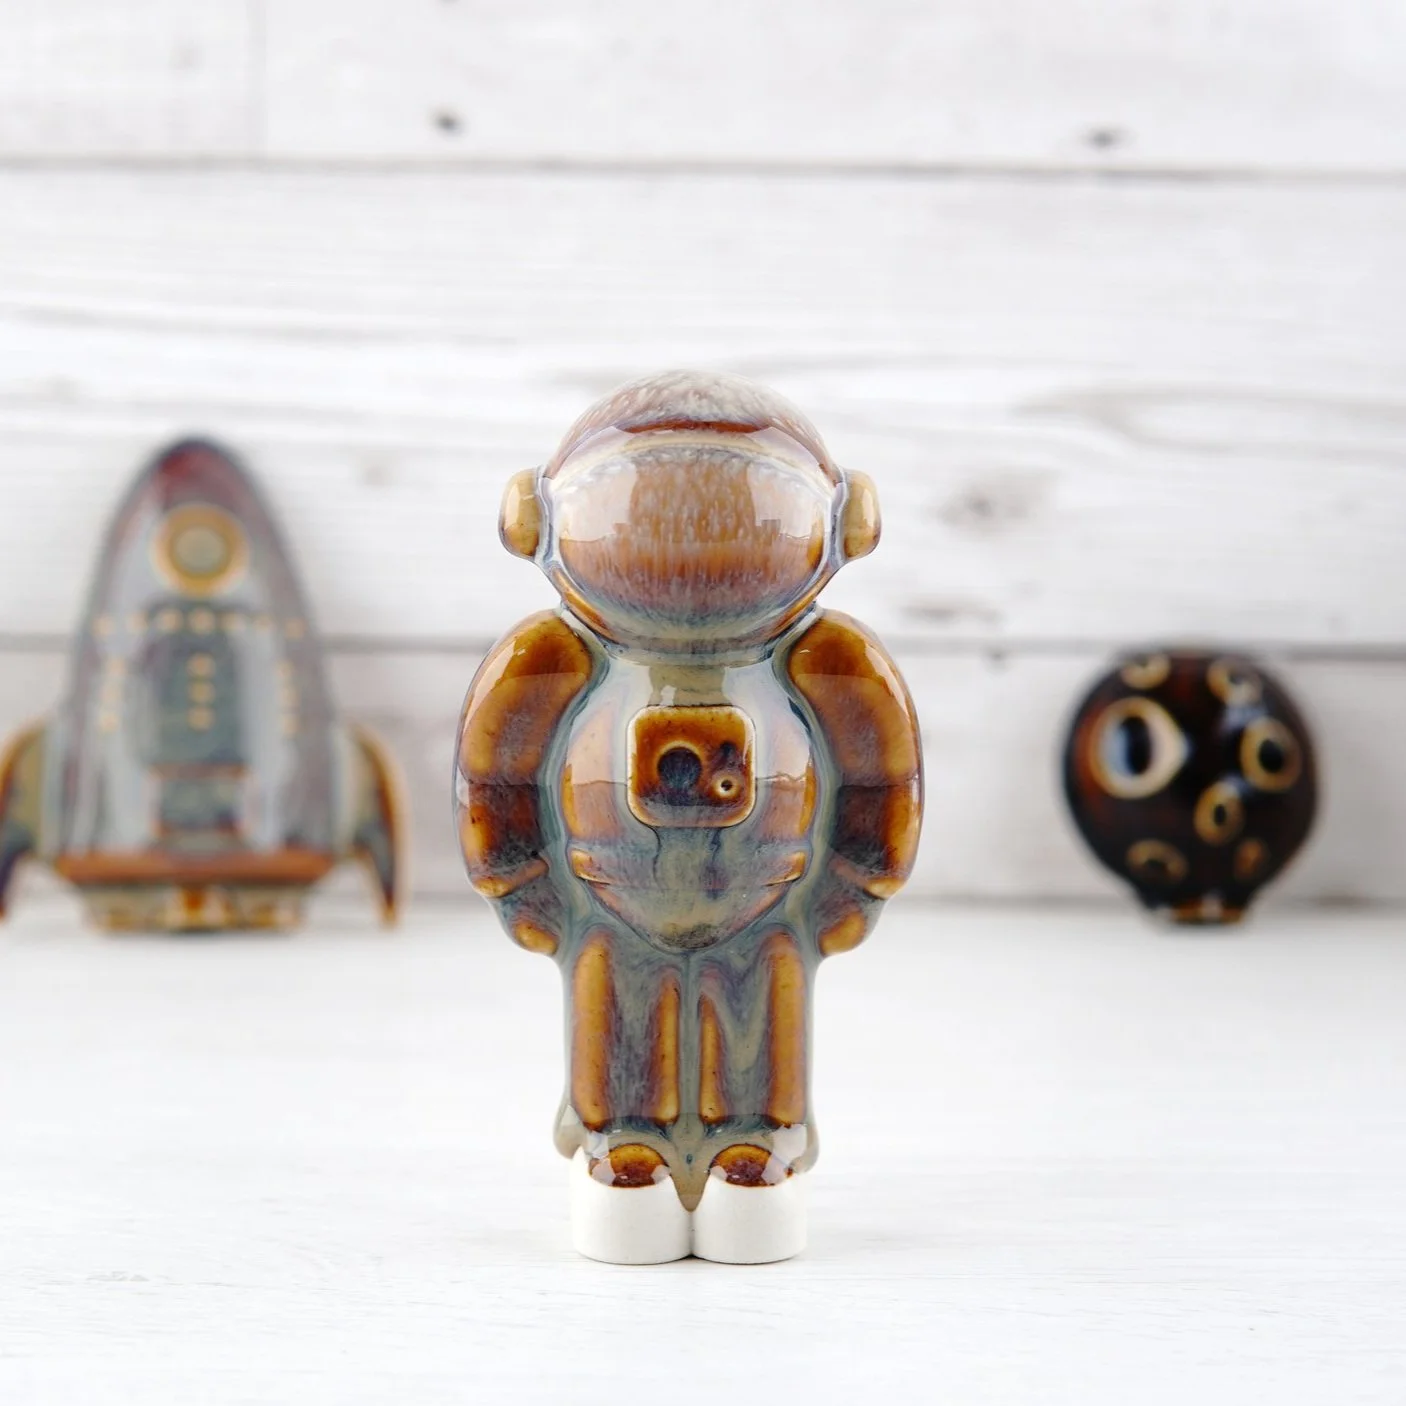
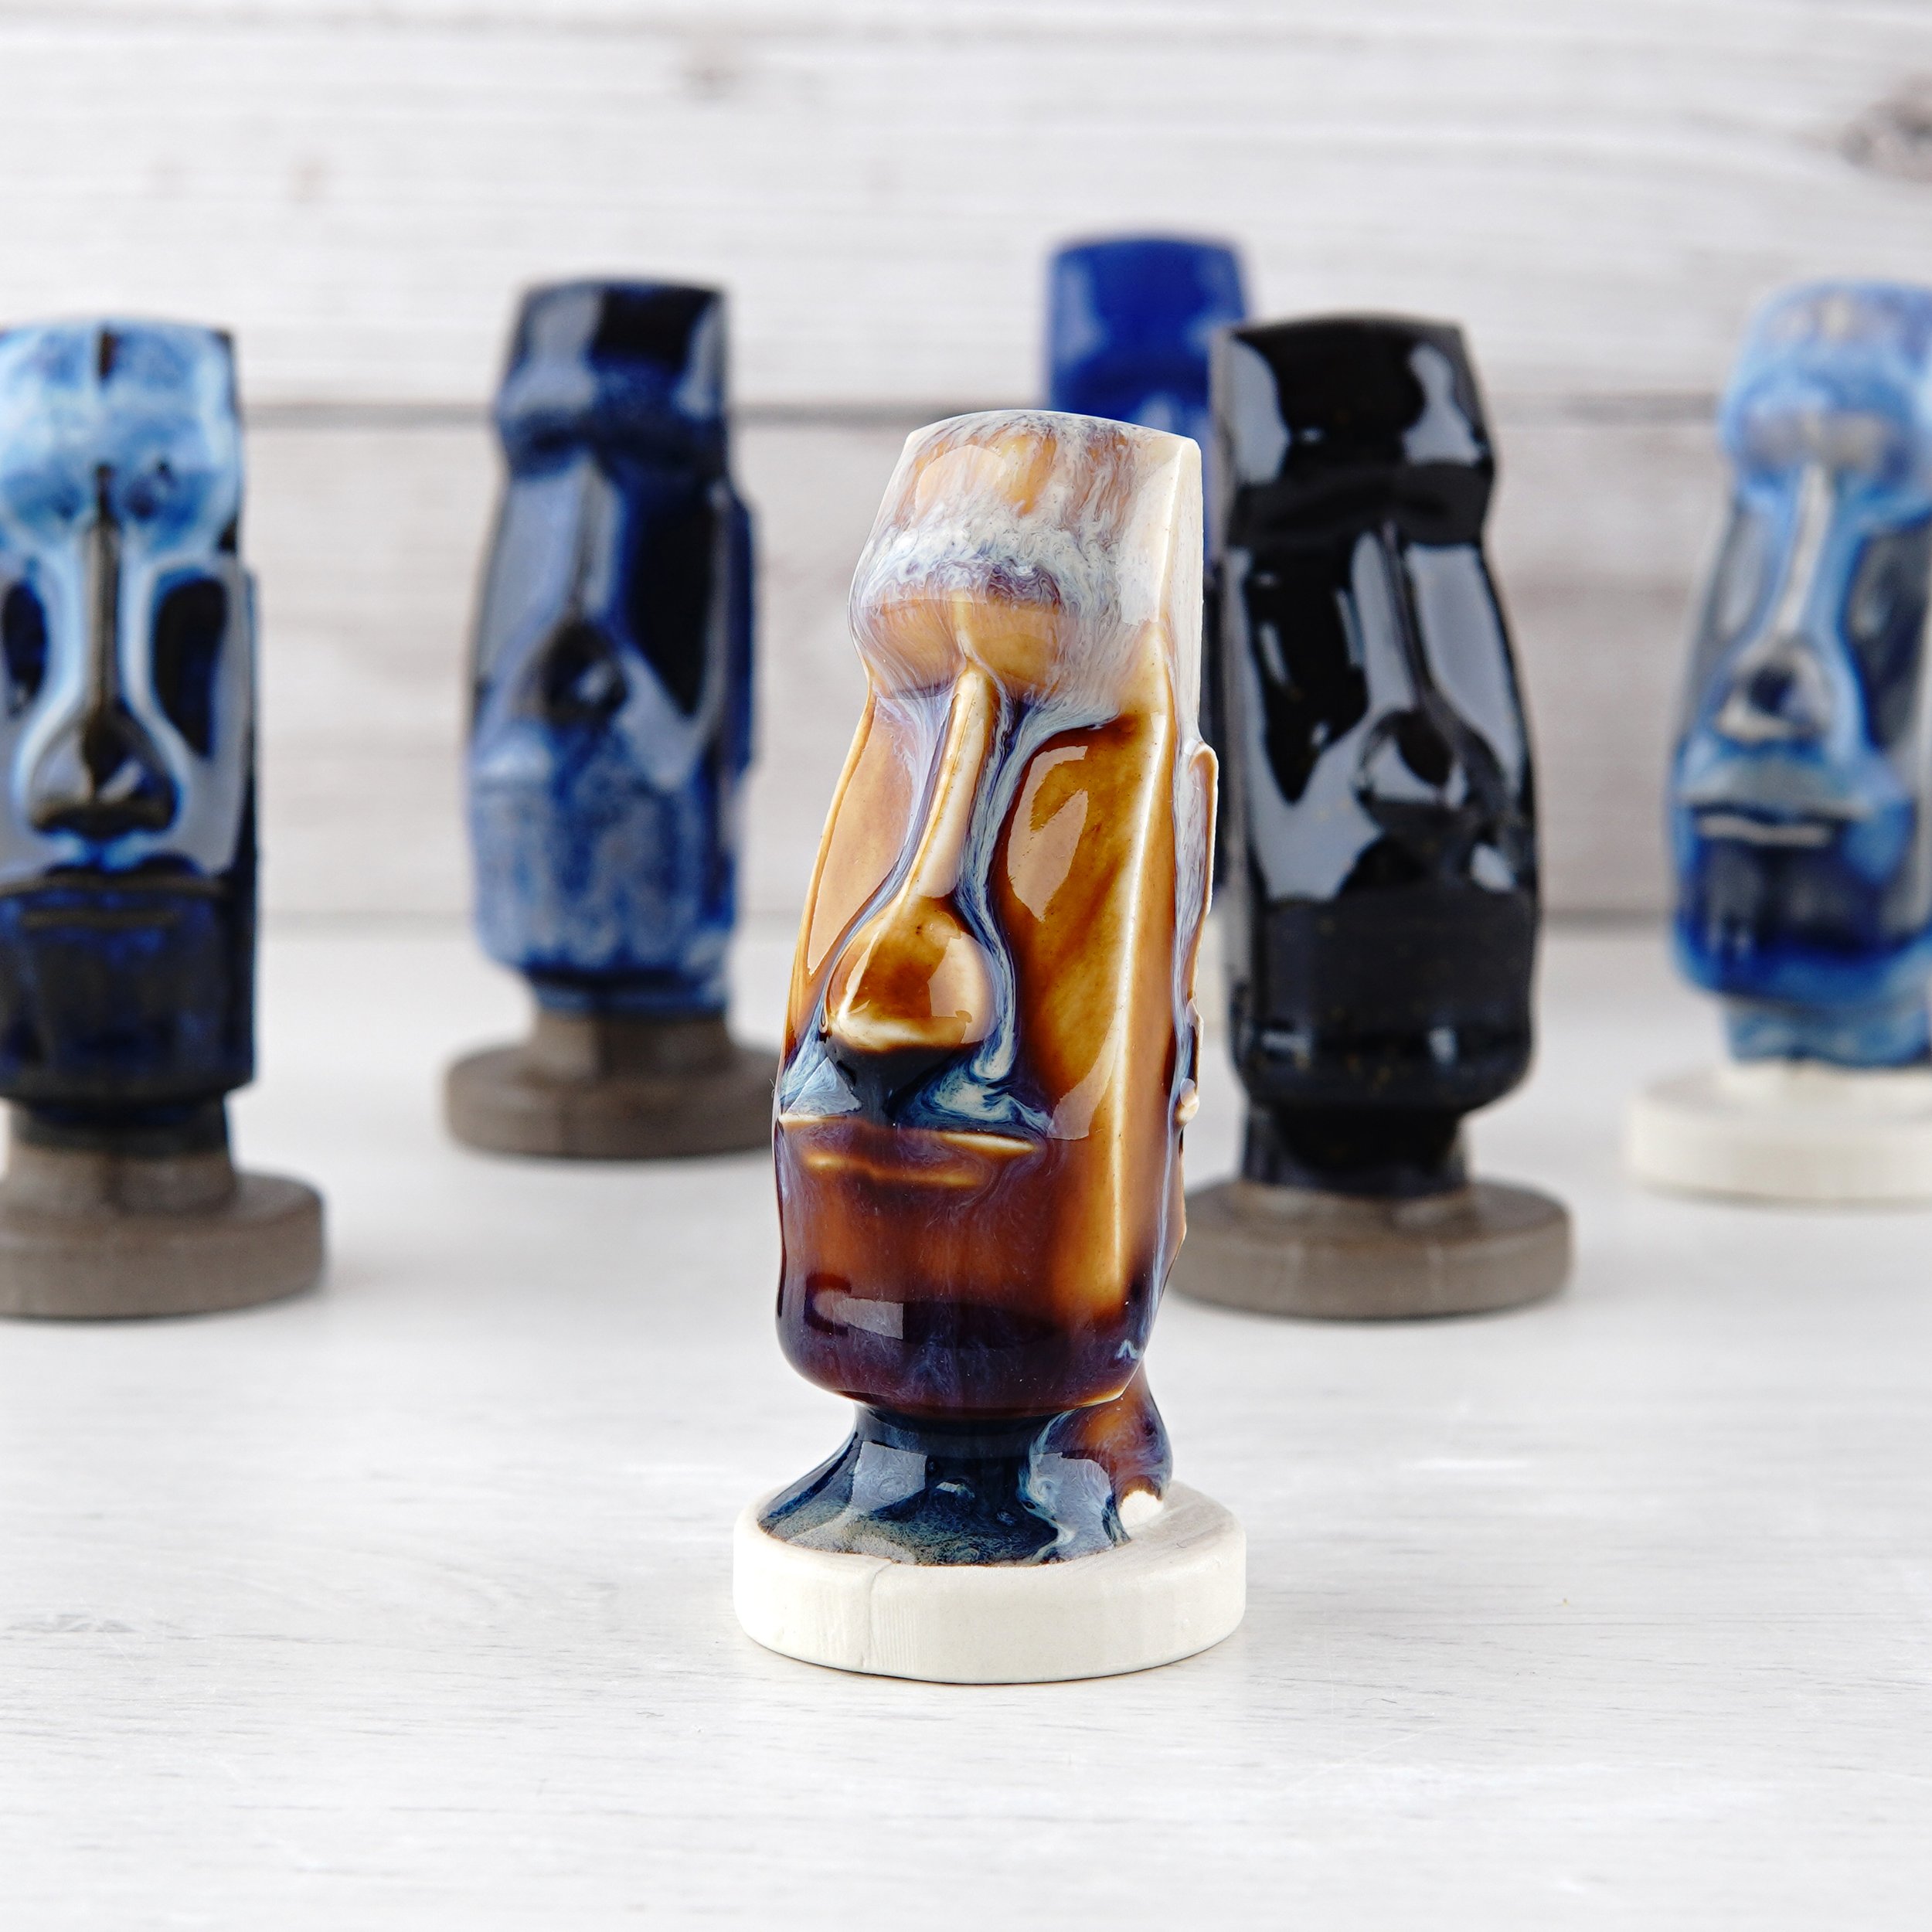
Slipcast ornament from baking mould
Plaster and Silicone
One of the difficulties with plaster is that it is incredibly inflexible and picks up every detail in a surface. If the item being cast in plaster is also inflexible and has a surface texture, this will lock the item in place so well that it might break the mould or itself when it’s removed. Overhangs present an issue for the same reason.

It can be difficult to avoid these issues and still make an interesting or useful mould when you first start working with plaster. Most beginner projects will have you pick a found object and cast that in plaster, using clay to mask off areas and separate the form into sections that prevent overhangs. This style of mould making is an artform in itself and can be very difficult to do well at the start. This is fine if you want to learn the full process, but putting the time into learning this stage might not be the best use of it otherwise.

It’s possible to skip past these issues by using a silicone mother mould (a mother mould is essentially a mould that produces moulds) which can be done by 3D printing a mould design, casting this in silicone, then casting your plaster moulds from the silicone mother mould. The silicone does an amazing job of transferring detail from the print into the cast plaster, but the flexibility is enough to prevent it getting stuck. It can produce multiple identical moulds from the same silicone. However, there’s a pretty huge time and financial commitment required to get to the point where the average person can design and print a mould, then cast that in silicone.
The best possible option would be if you were able to purchase the silicone premade. This would give the best of all worlds, and allow you to get into mould making with the lowest level of cost and complexity.
I’ve never seen silicone mother moulds sold for potters, but there are thousands of interesting mould designs for baking. These aren’t all suitable for making plaster moulds, and there are a few less than ideal aspects of the ones that are, but they can work well.
Silicone Baking Moulds
You can go on Amazon and browse the options to get a sense of just how many there are. There are basic geometric shapes (like muffin trays) which could be useful for simple functional pieces, but it really starts to get interesting when you find the ones with ornate designs.

Note that most of the interesting designs are showing us the outside of the mould. Functionally they don’t need to have the internal pattern repeated on the outside, but most are designed this way.
You’ll find that the majority carry their internal design through to the outside. This is important. While you would use the inside to bake a cake in that design, it’s the outside pattern that makes them really useful for slipcasting as we are going to cast plaster on the outside of the silicone.

The things to look for in a mould:
A design you think would make an interesting ceramic piece - There are some fantastic designs that would make perfect functional ceramic pieces, and some which would work better as cakes than ceramics. Try to imagine a shape going through the rest of the ceramic process (how you’d glaze and fire it) and how you could use it afterwards.
Check the scale - There is a real mix of sizing with these, some are tiny and some are massive. The price and example images might not give a good sense of this, you need to pay close attention to the dimensions
Look for supports - We’re not using these as intended, so there might be additional silicone supports on the outside. These won’t appear in baked goods, but will interfere with your mould. If you can’t see a picture of the outside of the mould, I wouldn’t advise buying it just in case
Silicone thickness - This will be harder to judge when buying online, but in general the cheaper ones are thinner. We want it to be as thick as possible. The thin ones are incredibly flexible, which makes them harder to work with.
The Process
Essentially, you just want to stick the mould down to the bottom of a box and pour plaster on top. You can do this any way that makes sense for the setup you have, but this is what I’d suggest:
Cast the inside of the mould shapes in plaster - With some moulds (like the hemispheres) this plaster shape can be a useful object in its own right. But at this point, we want it as support and ballast. These plaster shapes are going to sit inside the mould when the reverse is cast, preventing the mould from being squashed by the weight of the plaster and preventing the mould from floating up (hopefully). There are other ways you could avoid it, but you don’t want the insides to be full of nothing but air when you cast the reverse.

Find a box of a suitable size - I like using plastic storage boxes for this part as they’re quick, easy, cast well, and can’t leak. You can make a box yourself by cutting things to size (plastic, wood, etc) or by finding one that the mould can fit into. The closer to the mould size, the less plaster will be used unnecessarily, but it doesn’t matter if the size isn’t perfect. If you have cottle boards or want to make them, these are also a good option.
Stick the silicone down - I’ve been using a slab of clay stuck to the bottom of the box as a way of fastening the silicone in place. You could use another process if you can find one that works for you. The main thing is to try and prevent the mould floating up and plaster getting underneath.

Prepare the plaster (see below)
Pour the plaster (see below)


Remove the plaster from the box - It can feel like it’s stuck, but the issue is usually that its created an airlock. Pulling one of the box walls away will allow air underneath and allow the plaster to be eased out. It can take a little effort if there’s no taper in the plastic box, but once it starts to move you should be most of the way there.

Remove the silicone from the plaster - depending on the complexity of the mould you chose, this can be a bit tricky. Gently pull around the edges of the mould shapes to break the seal and ease the silicone out. The flexibility and elasticity of the silicone is the key here, but it will be fairly well locked into place by the plaster shape inside it. The silicone should be able to stretch a lot without damage, so make the most of that and pull fairly hard if needed to break the seal and ease the silicone out.


Clean up the plaster - An optional step, but rounding the corners makes the mould more durable and nicer to handle. Use a scraper, or a rasp, or just a sponge with scourer, and round off the sharp corners.

Leave it to dry - The plaster is saturated with water at this point and needs to dry out before it can be used. This can be sped up with increased airflow (pointing a fan at it) but shouldn’t be done with heat (don’t put it in the oven to dry out!). This might take a day or a week depending on the amount of plaster used.


Congratulations, your mould is now ready to cast!


Working With Plaster
On one hand, plaster is quite a simple material to work with. You just add water and give it a stir, and it’s ready. On the other, it can be really difficult to get it to work the way you want without issues.
One main goal when using plaster for slipcasting is to get a bubble-free working surface. This is a combination of the bubbles contained within the plaster mix itself and any extra bubbles trapped when pouring the plaster.
Mixing Plaster
Firstly, you want to be aiming for consistency in your process. This helps avoid many issues in the first place, as well as allowing you to repeat the process easily and consistently once you find a way that works for you.
Start by working out how much plaster you need. I recommend this calculator from Derek at Glazy for casting solid shapes. For the initial cast to fill in the silicone mould, you can work out the volume by putting it on scales and weighing how much water is needed to fill the shapes (1g = 1ml = 1cm^3). You can do this with any mould to calculate the volume of plaster needed, but getting the water back out can be more awkward with larger moulds.
Your plaster should come with a recommended ratio of water to plaster. If not, you can use the calculator above and work with the default of 70% water. The ratio of plaster to water will affect the density and strength of the plaster, but any percentage around 60-80% is likely to be ok as long as you’re consistent and you’re happy with the results.
Measure out the correct weight in cold water and put it into a container. I find it easier not to mix air into the plaster if the depth of the plaster is at least equal to the width (in other words, a shallow mix in a wider container is bad, a deep mix in a narrower container works better).
Measure out the plaster. Put the plaster into the water. Sifting the plaster to break it up and disperse it across the surface is a good idea. Wait for a couple of minutes without mixing the plaster. The plaster will absorb the water (called slaking) and any large bubbles of air brought in with the plaster will be free to float out. It’s the mixing process that starts the chemical reaction in the plaster, so the plaster can happily sit for a few minutes at this stage.
After a couple of minutes, you can start mixing. The goal is to get a smooth, well mixed plaster with as few air bubbles trapped as possible. The mixing process can help or hinder this. Depending on your choice of container, choice of mixer (electric or manual), speed of mixing, etc, you can either work to gradually remove air bubbles by bringing them to the surface or you can force more air down into the plaster. If you use an electric mixer at a speed where a vortex forms, you’re adding air into the plaster (this is not good!),
For small amounts of plaster I use an old 500ml yoghurt container as the mixing pot and a paintbrush to stir (more on that in a bit), and for larger amounts of plaster I use larger plastic pots and a cordless drill with mixer attachment. There are many types of mixer attachment head for drills, and they function differently.
However you choose to mix, the first stage of mixing will be ensuring that there are no clumps of powder and the mix is smooth (this requires a lot less effort than mixing something like slip/glaze), then the mixing should be enough to draw bubbles to the surface but not vigorous enough to add more air into the mix. Air bubbles will naturally want to rise, and any movement of the plaster will cause this to happen. This could be mixing at a medium speed with a paddle mixer, it could be swirling the plaster around in the container, it could be using a vibrating platform. As long as the plaster is moving, the bubbles will slowly work their way to the surface.
Once bubbles are on the surface, they can be easily popped by spraying a mist of IPA/Alcohol to break the surface tension.
You get a few minutes mixing time before the plaster starts to change consistency and become less fluid. How long you wait before pouring is up to you, but it’s best to use a timer and mix for a consistent amount of time.
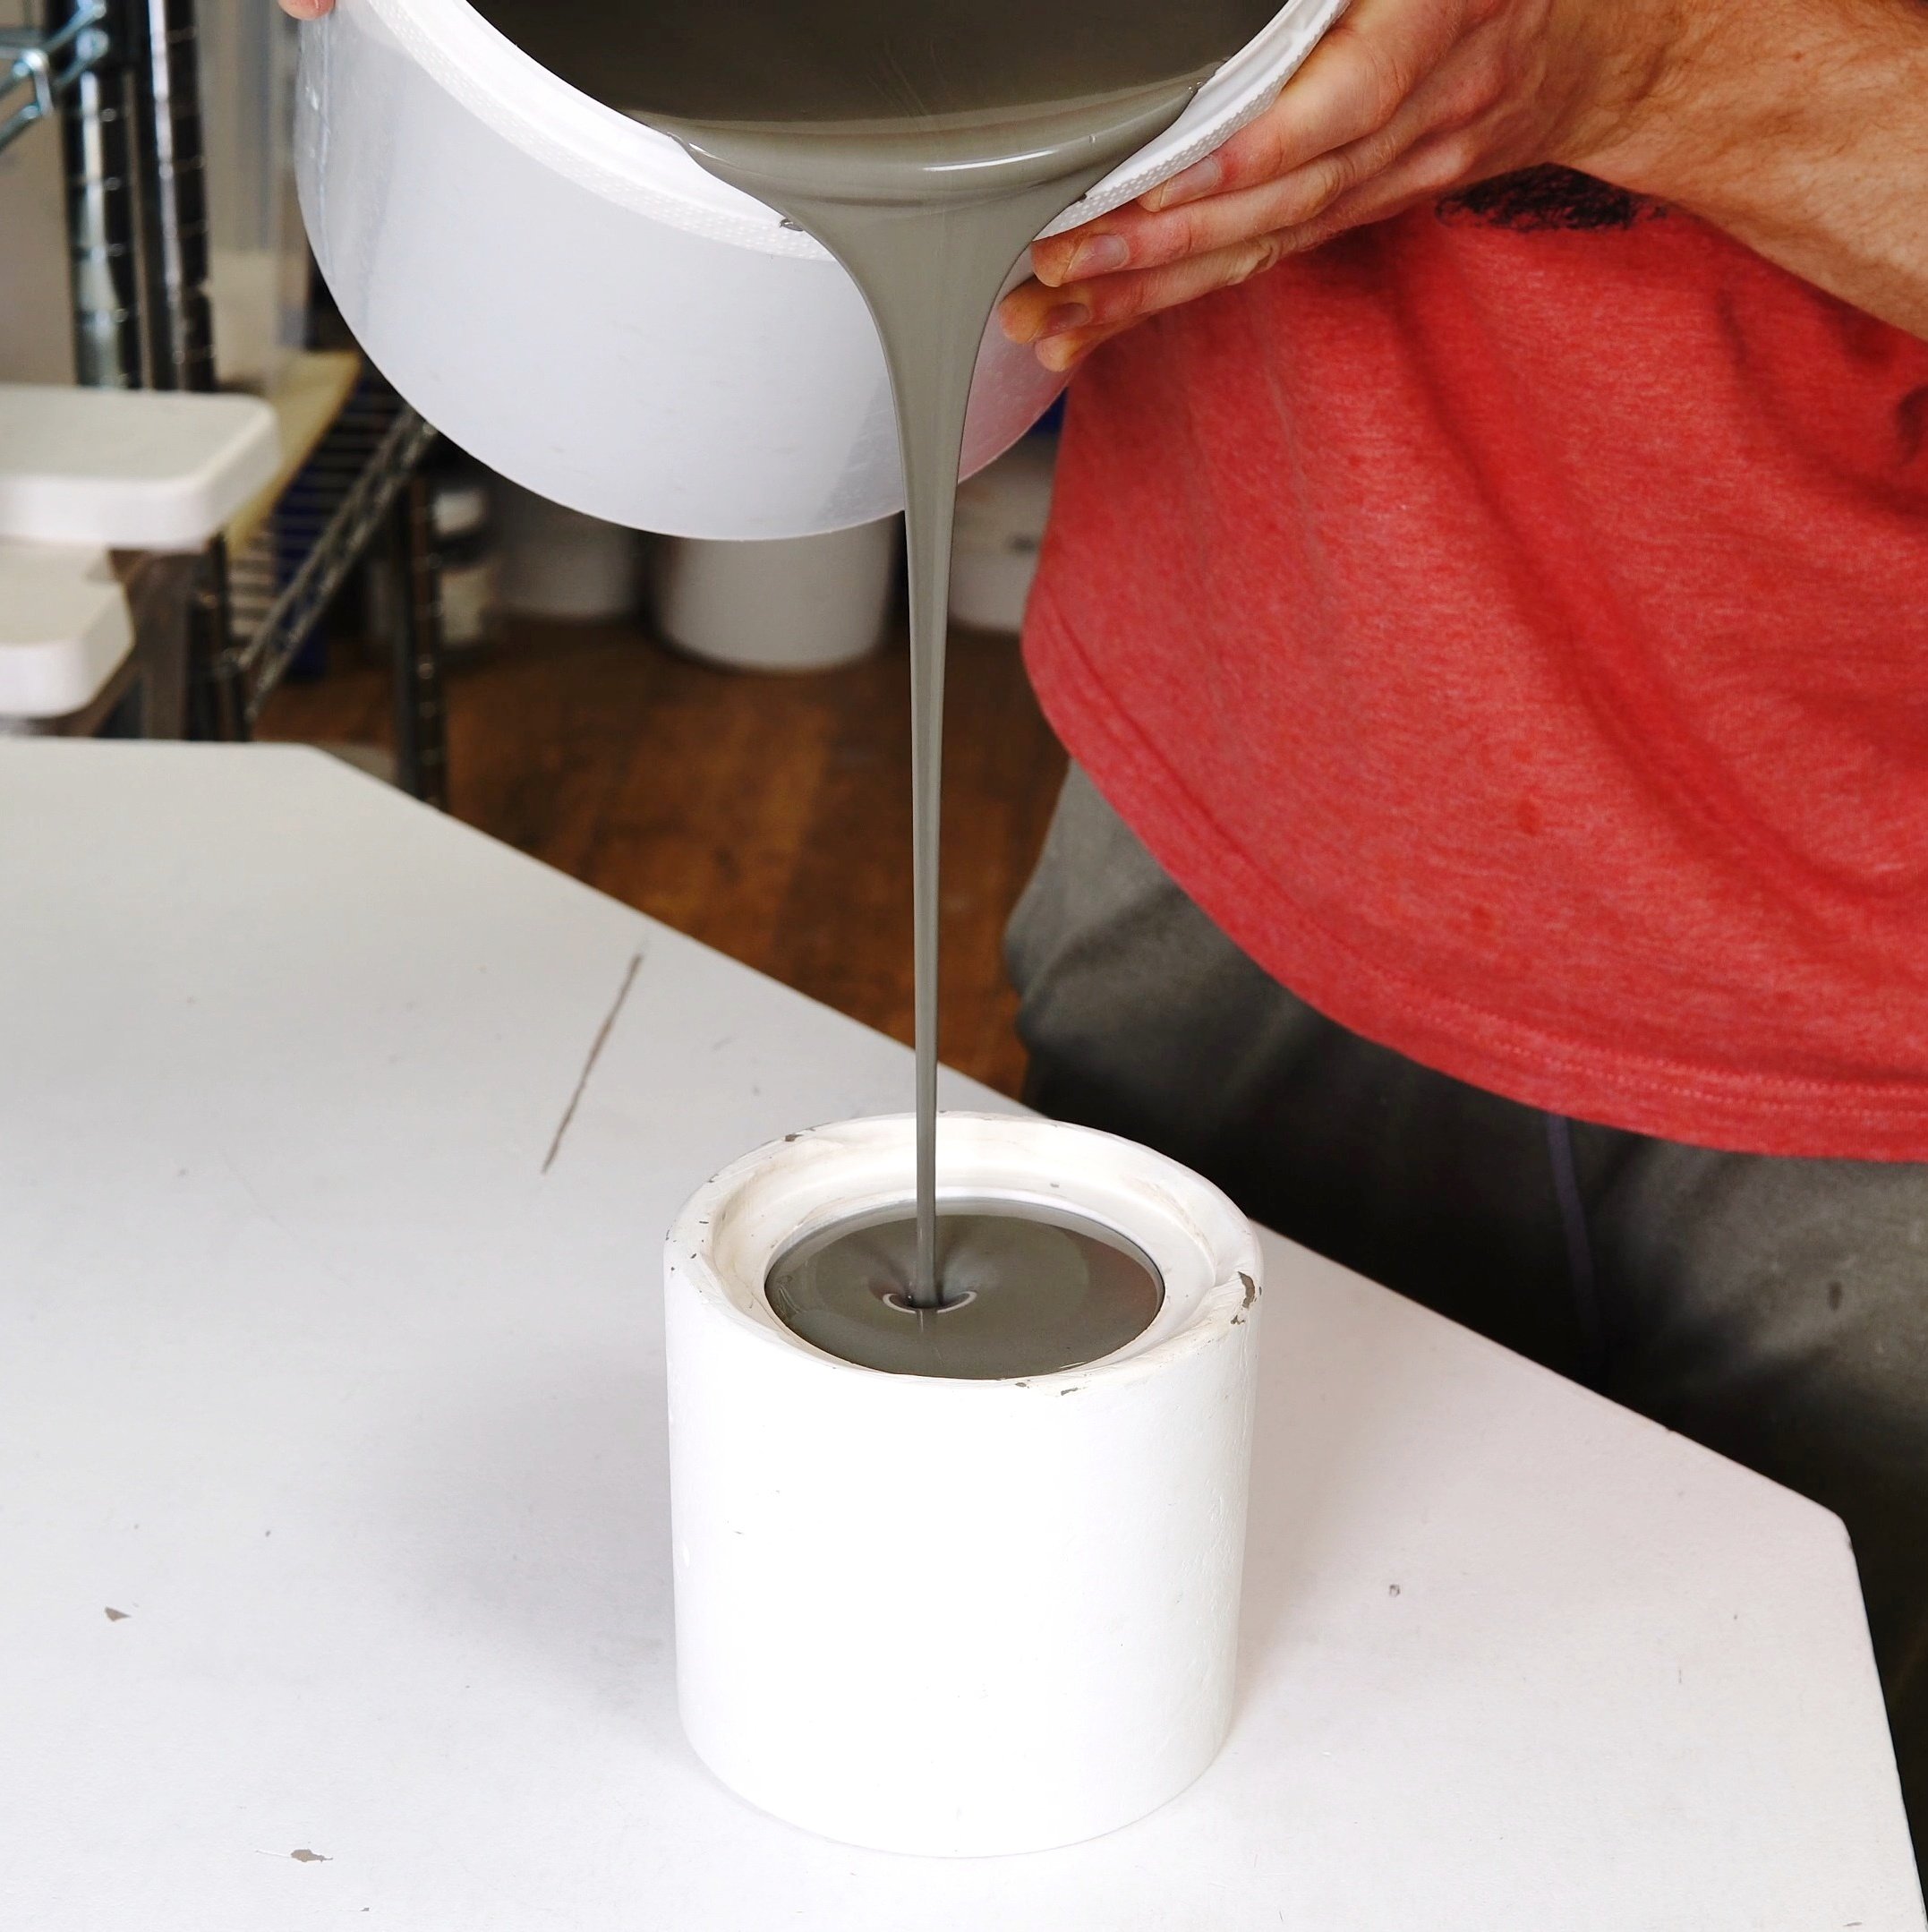
Pouring The Plaster
Once you have well mixed (and hopefully fairly bubble free) plaster, and you have your mould set up, the next step is pouring the plaster into the mould.
Silicone is hydrophobic, which essentially means that water/plaster won’t naturally flow as easily into corners. This makes it far easier for air bubbles to become trapped between the silicone and plaster. There is an easy way to reduce this though. Spraying a mix of water and Windex (or similar glass cleaner) onto the surface first will reduce the surface tension experienced by the plaster and make it easier for it to flow into the corners.
The way you pour the plaster has an effect too. If you pour in a single low point and let it flow over the surface from there, it will be far more likely to force air out than if you splatter the plaster all over.
Once the entire surface of the silicone is covered in plaster, there’s another trick to getting rid of air bubbles trapped against the surface. Take a small paintbrush and saturate it in plaster (this is why I like mixing smaller amounts of plaster with a paintbrush), then use the bristles to lightly brush over the surface of the silicone to dislodge any air bubbles. As the brush is saturated with plaster, any dislodged bubbles will be replaced with plaster rather than air, and no new bubbles should be added. The movement should help the bubbles move upwards to the top as well, but it’s far more important that there are no bubbles on the mould surface than trapped in the mass of the plaster.
Once you have done that, you can gently pour in the remaining plaster if there’s any left (I’d recommend leaving some out if you’re filling your plastic box to near the top and might spill some in the brushing stage, but otherwise I’d add it all at the start). Lightly tapping the side of the box will also help bring bubbles to the surface. Another spray of IPA/Alcohol will pop the surface bubbles here.
Using The Mould
Plaster moulds can be used as sprig moulds or for slipcasting.
If you’re just getting started with slipcasting, I’d recommend keeping this as simple as possible to start. You can buy premade liquid casting slips. I haven’t used one that I thought was perfect, but they’re definitely a good way to skip essentially all of the complexity and effort.
The next level of complexity is a dry casting slip with the deflocculant added. These just require the addition of water, but will need to be mixed and sieved. They have most of the effort of a homemade slip, but less complexity. You can also buy premixed powdered slips without deflocculants. To prepare these, you’ll need to add water and a deflocculant (Darvan, Sodium Silicate, etc). These give you more control over the slip behaviour but introduce more complexity as the levels of water and deflocculant need to be decided.
Finally, you can make your own from a recipe. It’s barely any more work than a premade dry slip mix, as there will only be a handful of dry ingredients and the effort is in the mixing and sieving stages rather than the weighing. I definitely wouldn’t recommend this for total beginners, but is worth considering if you’re comfortable with making slip from a premade dry mix.
When you have a slip you’re happy with, all you need to do is pour it into the mould, wait for the wall thickness to build up to the right level, and pour the excess back out. Once the slip firms up, you can demould the piece and clean it up.
Shopping List
Obviously the main point of this project is that it gives you a load of choice about which direction you go with it. However, if you want a tested and very fun jumping in point, this is what I used for the Minisaurus Magnets and Lego test tiles:
Dinosaur Mould - Selecto Bake Cute Dinosaur Silicone Mould - UK Link / US Link
Lego Mould - CMJ Yellow Robot Figures Men Silicone Chocolate Mould - UK Link / US Link
Box - IKEA 365+ 1L Plastic Food Container - UK Link / US Link
Plaster - Potter’s Plaster - UK Link / (I’ve heard #1 Pottery Plaster is a good choice in the states)
Legality
Can you legally use silicone moulds this way?
As I understand it, only for personal use.
The design of the mould and the pieces it produces are covered by copyright, which belongs to the person or company who produced it. They sell the moulds with a specific set of terms of use, which will allow you to legally use the item in certain ways. These would generally prohibit commercial uses (and that might include posting pictures on social media as well as selling the items you produce with the mould).
Whether you can do it without them noticing is a different matter, and it’s quite likely that you can, but you would be selling ceramic pieces with a copyrighted design you don’t have permission to use.
Obviously, this is far more apparent when the mould was of a specific well-known design/character. A more generic mould design won’t be so clearly infringing on copyright.

If you like this sort of content and want to support the creation of more, I now have a Patreon specifically for it or a page on my website if you just want to make a single donation.